Category: Blog

  • How to Set Up a GNSS Base for Reliable RTK

    How to Set Up a GNSS Base for Reliable RTK

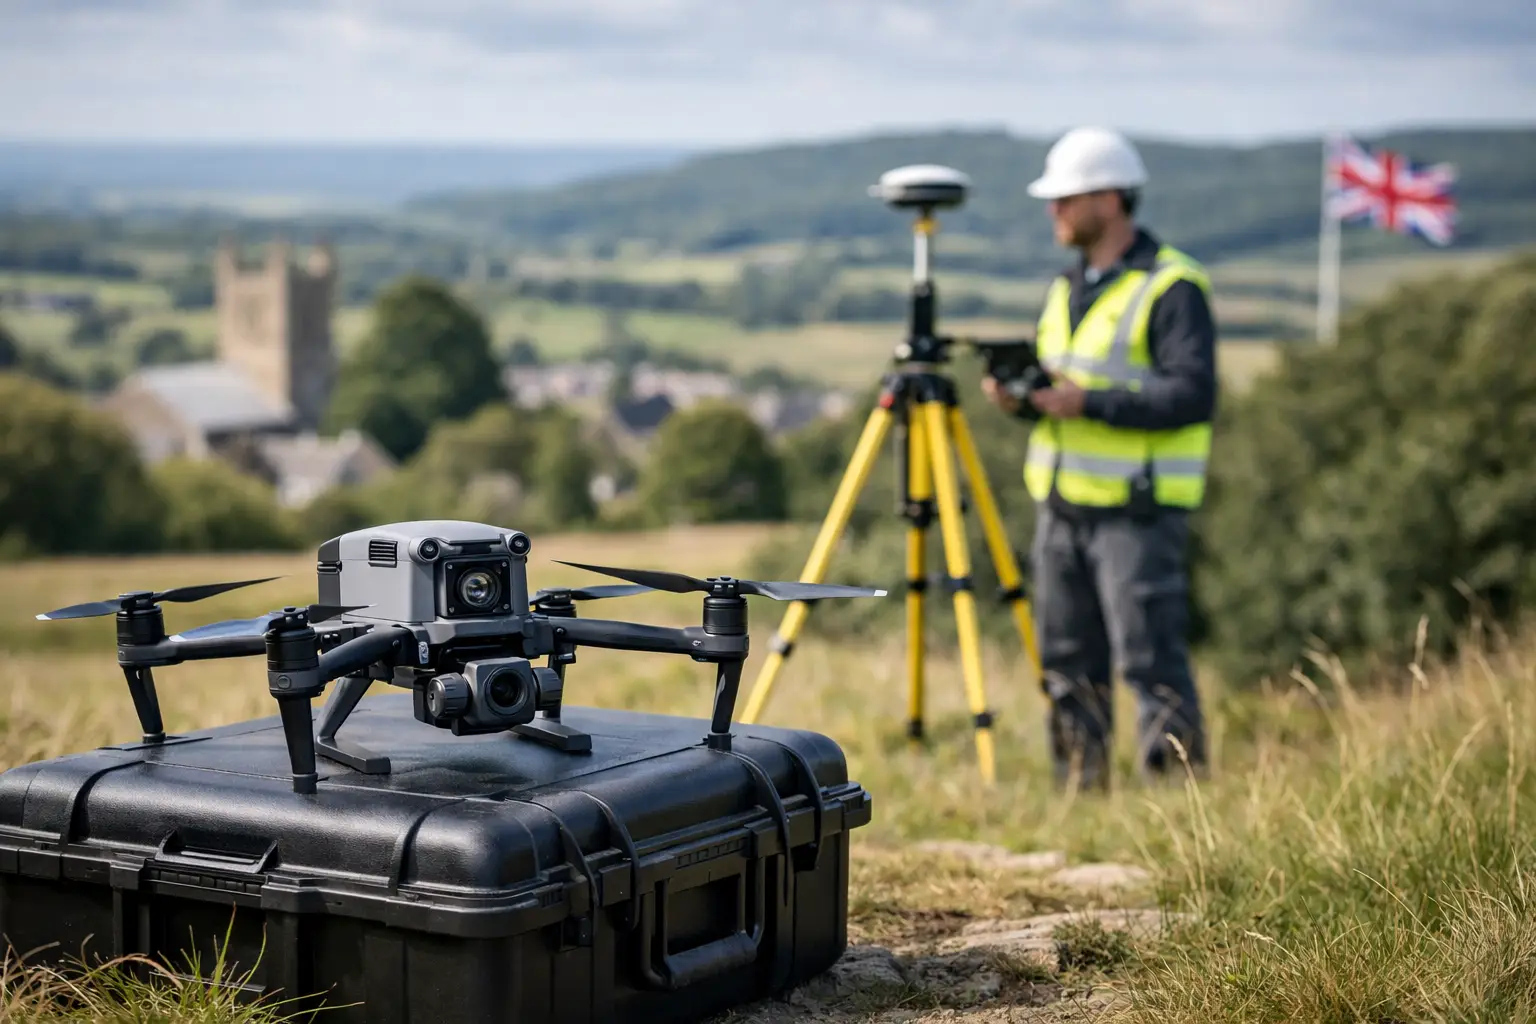
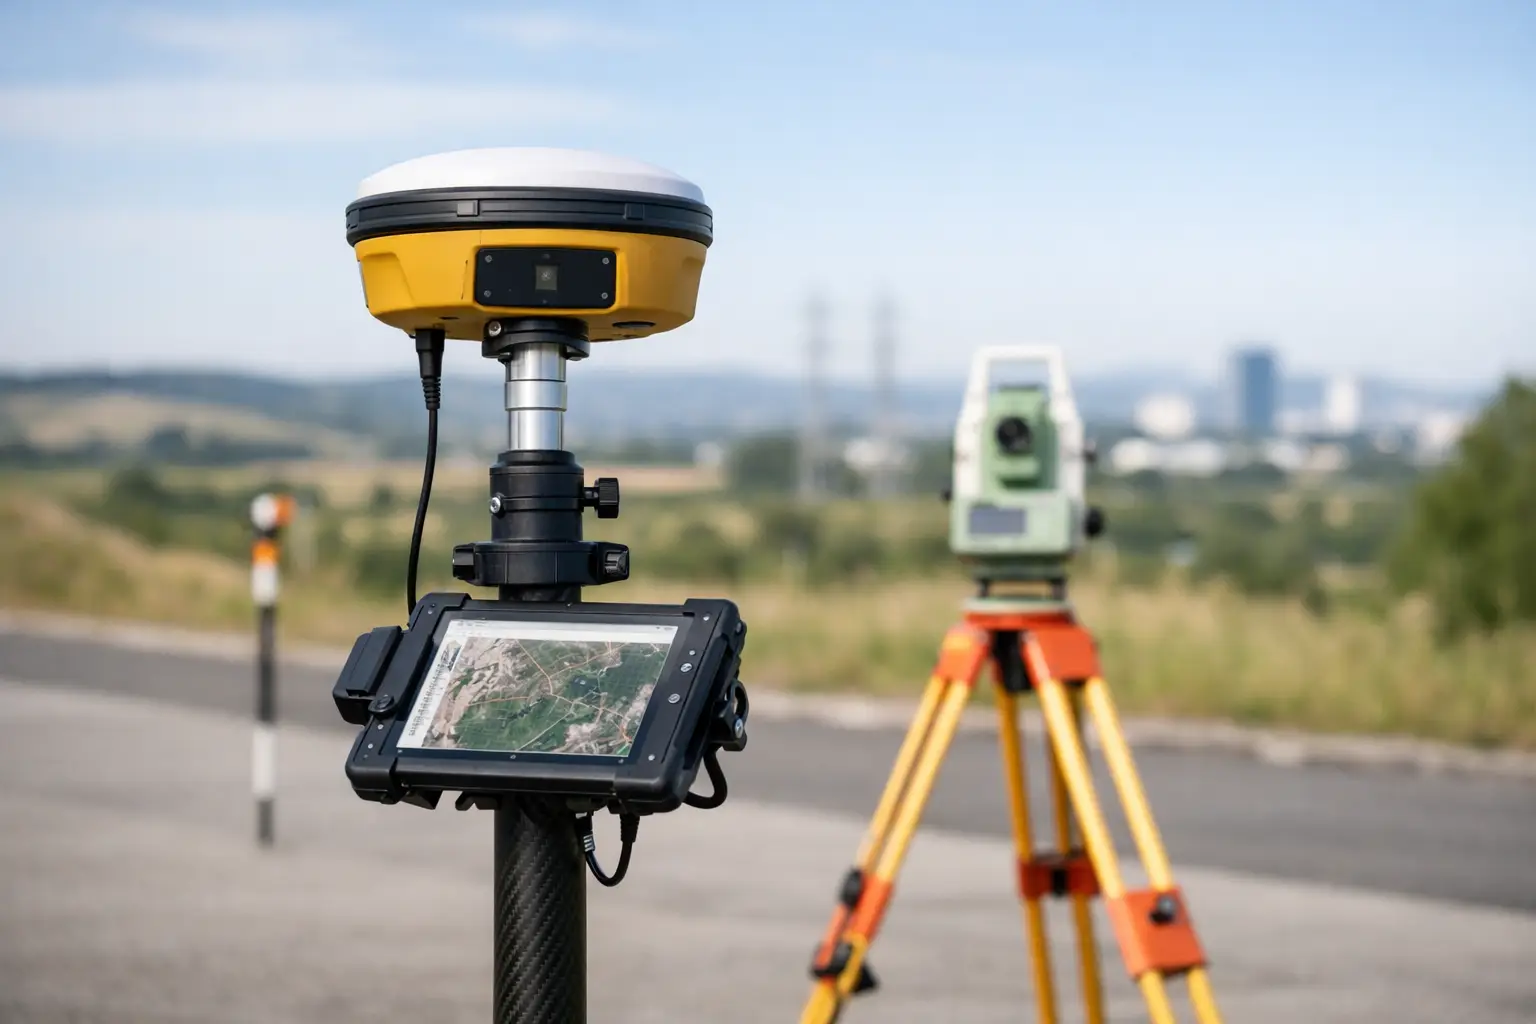
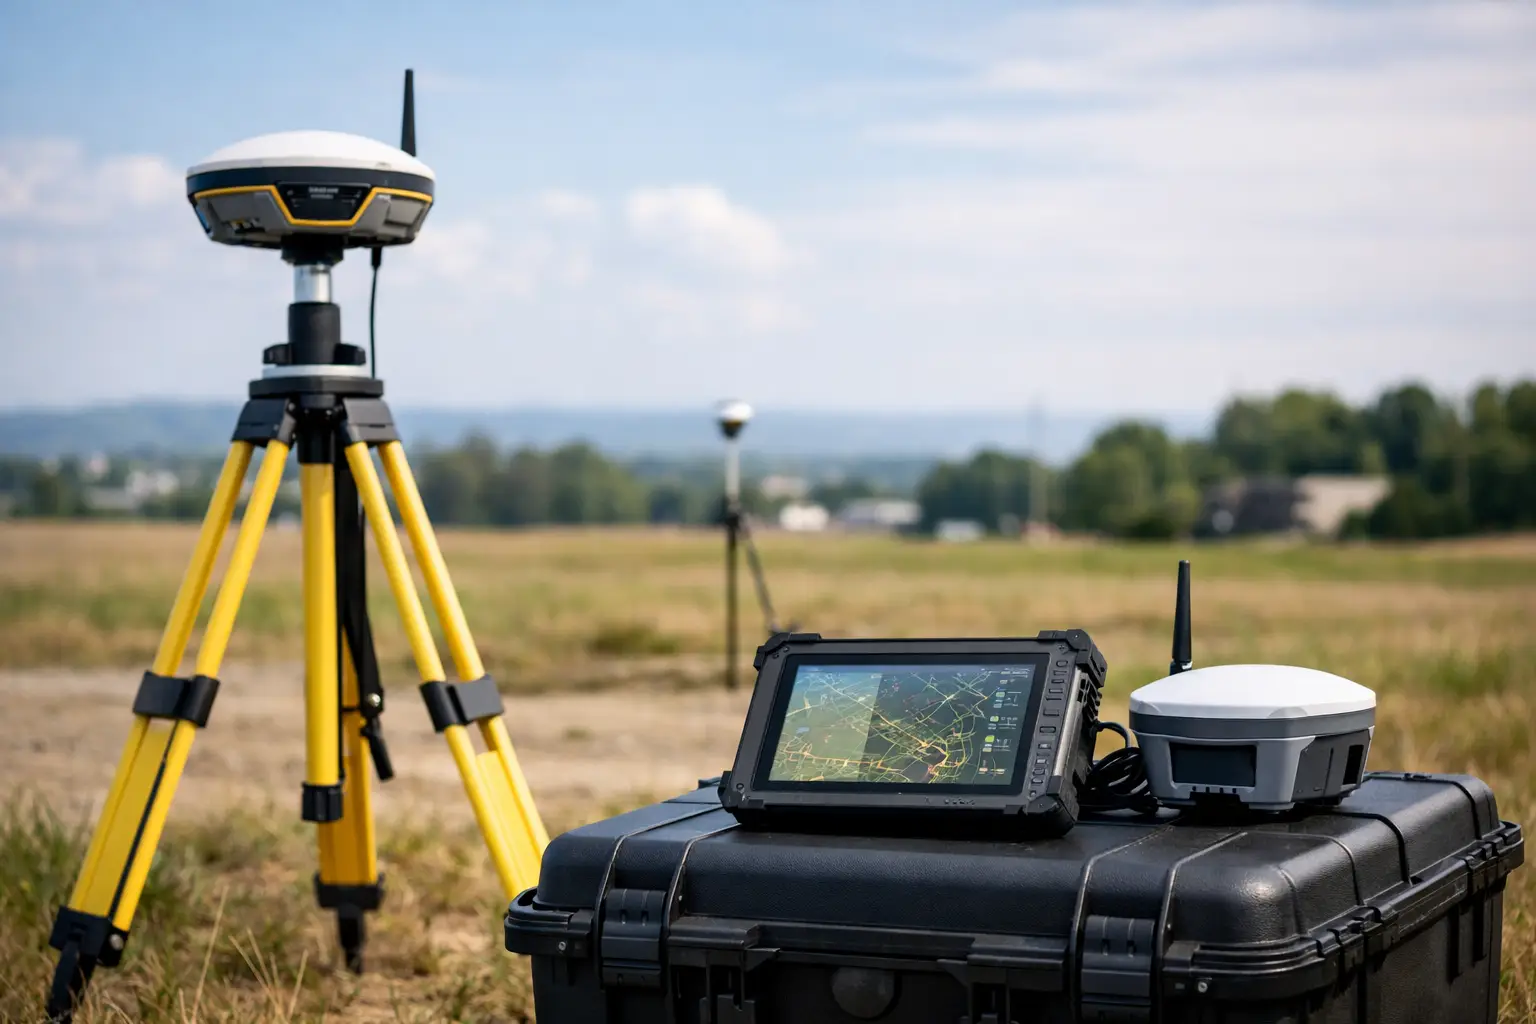
    A GNSS base is only as reliable as the control behind it. A high-specification rover can still produce poor positions if the base has been placed beneath obstructions, assigned the wrong coordinate system or configured with an incorrect antenna height. Knowing how to set up GNSS base equipment correctly is therefore fundamental to producing repeatable RTK results for setting out, topographic surveys, machine control and asset capture.

    For UK projects, the objective is not simply to achieve a fixed solution. It is to achieve a fixed solution that agrees with the required site grid, datum and level reference, and that can be verified throughout the working day.

    Start with the required survey control

    Before erecting the tripod, establish what the delivered data must match. This is particularly important where a project combines GNSS observations with total station work, existing design models, OS mapping or client-issued control.

    Confirm the horizontal datum and coordinate system, the vertical datum and geoid model, and whether the project uses a local site calibration. A base broadcasting ETRS89 positions while the rover is expected to deliver OSGB36 National Grid coordinates will introduce a consistent but potentially significant discrepancy. Likewise, ellipsoidal heights are not interchangeable with orthometric levels used for construction and drainage work.

    If verified control marks are available, occupy one of them. This provides the strongest basis for a local RTK setup because the base coordinate is known rather than estimated. Use the published coordinate values exactly as supplied, including the correct unit and coordinate order. Check whether heights refer to the ground mark, a reference point or an antenna reference point.

    Where no established control exists, an averaged autonomous position can support lower-risk work such as rapid mapping, volume estimates or initial site reconnaissance. It should not be treated as permanent survey control. The resulting coordinates may shift between sessions and will not necessarily agree with other survey datasets.

    Choose a base location that protects signal quality

    The best base location is stable, open to the sky and representative of the working area. A permanent survey pillar, a sound control point or a securely planted tripod on firm ground is preferable to a pavement edge, temporary compound surface or anything likely to move during the survey.

    Keep the antenna clear of trees, cranes, buildings, metal cladding and parked plant. These features obstruct satellite signals and can cause multipath, where reflected signals reach the antenna after the direct signal. Multipath can reduce repeatability even when the receiver reports an RTK fixed status.

    A clear horizon is valuable, but practical site conditions often require compromise. If the only viable point has partial obstruction, identify the affected directions and test the rover at the extremities of the intended survey area. A base on high ground may provide better radio coverage, but only if it remains secure and does not force unsafe access or expose equipment to site traffic.

    For longer occupations, protect the setup from accidental disturbance. Use a sturdy tripod, fully seat its feet and mark the position if the base needs to be re-established later. On active construction sites, barriers and clear communication with site management are often as important as receiver settings.

    How to set up GNSS base hardware accurately

    Mount the GNSS antenna or integrated receiver on a tribrach and tripod, then centre it precisely over the control mark. Use the optical plummet where available and level the tribrach before entering any coordinates. Integrated receiver systems with tilt compensation can make field work faster, but the base itself should still be level and centred unless the manufacturer specifically supports an alternative method.

    Measure the antenna height carefully. This is one of the most common sources of avoidable error. Receiver software may ask for a slant height, vertical height or a measurement to a specific antenna reference point. Select the measurement method that matches the equipment and record it in the survey notes.

    Do not assume a tape measurement is correct because it was taken once. Measure the height twice from different directions and compare the values. If the readings disagree, resolve the reason before starting the broadcast. A few millimetres of error at the base can directly affect rover elevations across the site.

    Enter the known base coordinates, select the correct datum, projection and geoid, and allow the receiver to initialise fully. If operating on a local grid, load the approved localisation or calibration file rather than attempting to recreate parameters from memory. A properly documented configuration is essential where multiple crews or return visits are involved.

    Configure the correction link

    The base must send corrections to the rover through either a UHF radio link or an internet-based NTRIP connection. The right method depends on site geography, communication infrastructure, required range and project operating model.

    UHF is often effective on contained sites where mobile coverage is poor or corrections must remain independent of an external network. Set the same radio protocol, frequency, channel spacing and data rate on both base and rover. Radio power should be appropriate to the required coverage, not automatically set to maximum. Higher output can improve range, but it consumes more power and must comply with applicable UK radio licensing and frequency requirements.

    An NTRIP setup can be useful where a stable internet connection is available and teams need corrections across dispersed locations. The base requires a reliable mobile data connection and an NTRIP caster or correction service configuration. Confirm that the mountpoint, format and credentials are correctly entered, then verify that correction age remains low at the rover.

    In either case, match the correction message format to the rover capability. RTCM is the common choice for modern multi-constellation systems, but the selected version and enabled constellations must be compatible across the workflow. GPS, Galileo, GLONASS and BeiDou observations can improve availability in challenging environments, provided both units are configured consistently.

    Initialise the rover and check the result

    At the rover, connect to the base correction stream and wait for an RTK fixed solution. Check more than the word “fixed”. Review correction age, satellite count, PDOP, radio signal or internet stability, and reported horizontal and vertical precision. A fixed solution with high correction age or intermittent communications should be investigated before work starts.

    The first practical quality-control test is to measure a second known point. Occupy it for long enough to obtain stable readings, then compare the observed position and level against the published values. Repeat the observation after moving away and returning to the point. This confirms that the base coordinate, antenna height, localisation and correction link are all working together.

    For engineering work, establish project tolerances before deciding what constitutes an acceptable check. A general topographic survey may permit a different tolerance from kerb setting out, structural works or as-built verification. Record the observed residuals, time, receiver details and correction method so results remain defensible if queried later.

    Maintain control throughout the day

    A satisfactory start-up check does not remove the need for ongoing verification. Re-check a known point after breaks, after moving the base, following a power interruption, and before issuing final data. If the check changes unexpectedly, stop collecting critical observations until the source has been identified.

    Common causes include a disturbed tripod, an incorrect antenna-height entry after restarting the controller, a changed coordinate system, radio interference or a rover that has reverted from fixed to float. Tree canopy and changing satellite geometry can also affect field performance, particularly in urban corridors, woodland and steep-sided sites.

    Keep concise field records: base point ID, coordinate source, antenna height and measurement method, radio or NTRIP settings, start and finish times, and check-point results. These notes allow a survey team to reproduce the setup, support QA procedures and quickly isolate issues when data does not align.

    For teams deploying RTK systems across varied UK sites, LiDAR Tech UK can assist with receiver configuration, site workflows and training aligned to the required survey output. The most productive setup is the one that is not only fast to deploy, but also straightforward to validate and repeat.

    A GNSS base should be treated as the control centre of the survey, not merely a transmitter on a tripod. Give the coordinate reference, antenna height and independent checks the same attention as the rover measurement, and your RTK data will carry the consistency needed for confident decisions on site.
  • Drone Mapping Versus Ground Survey: Which Fits?

    Drone Mapping Versus Ground Survey: Which Fits?

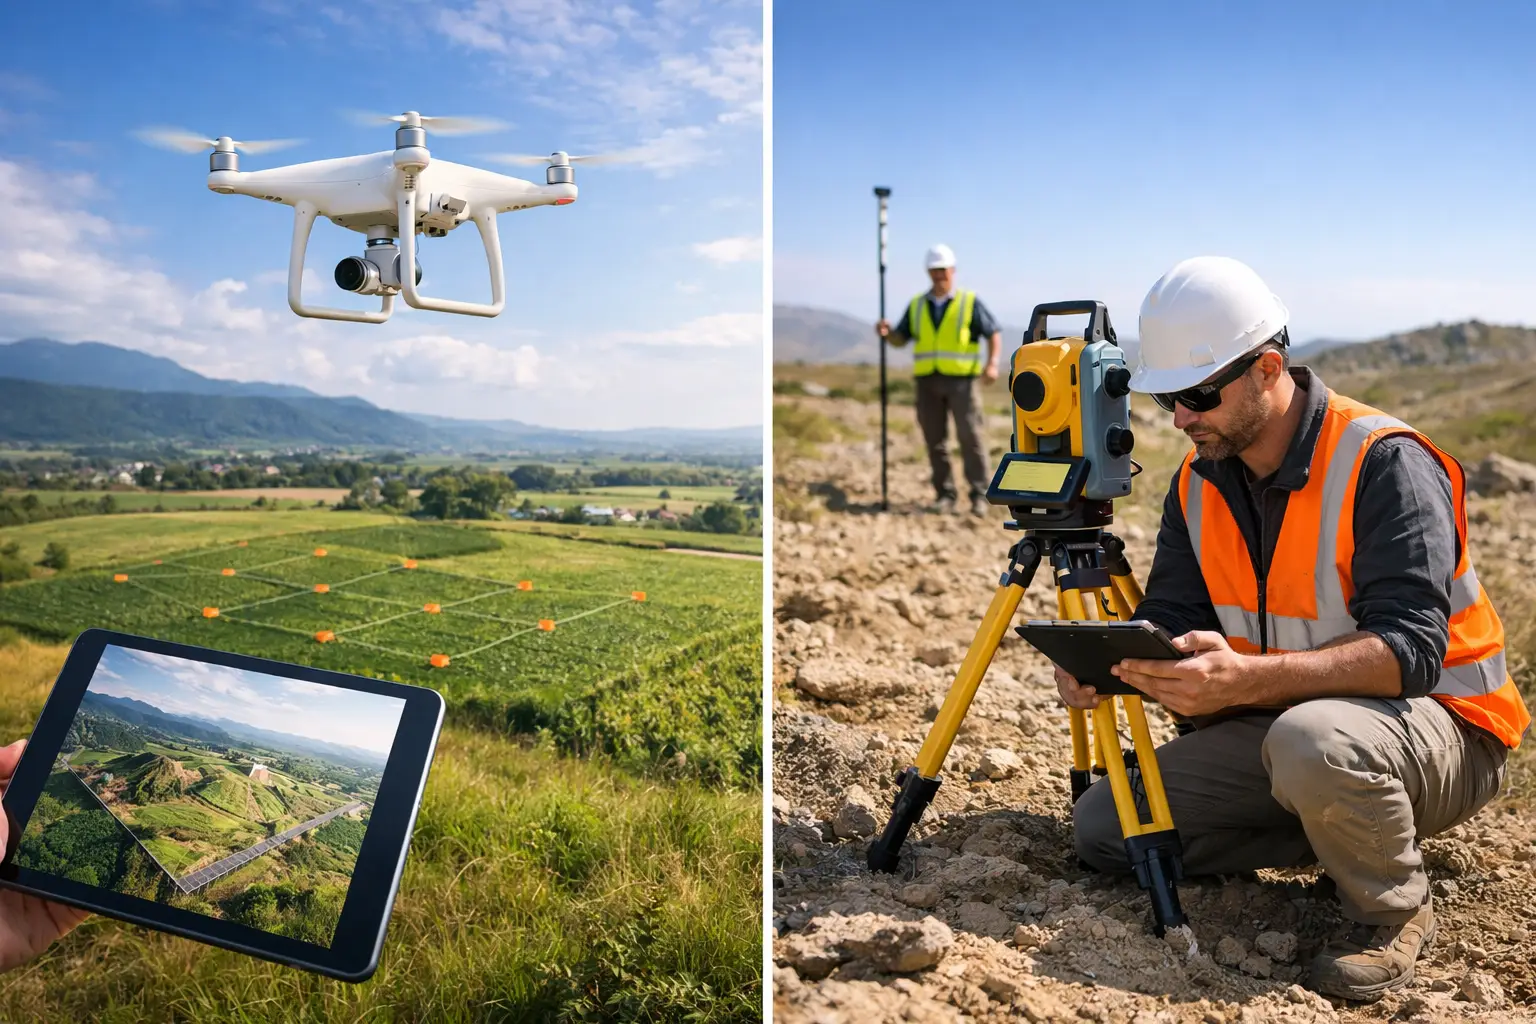
    A 40-hectare construction site does not always need weeks of boots-on-the-ground measurement. Equally, a drone flight cannot establish a reliable kerb line beneath dense tree cover or set out structural elements to millimetre-level tolerances. The decision between drone mapping versus ground survey should be based on the required accuracy, site conditions, deliverables and programme – not on which technology appears quicker at first glance.

    For most professional projects, the strongest answer is not drone or ground survey. It is a planned workflow that uses each method where it produces the most dependable result.

    Drone Mapping Versus Ground Survey: The Core Difference

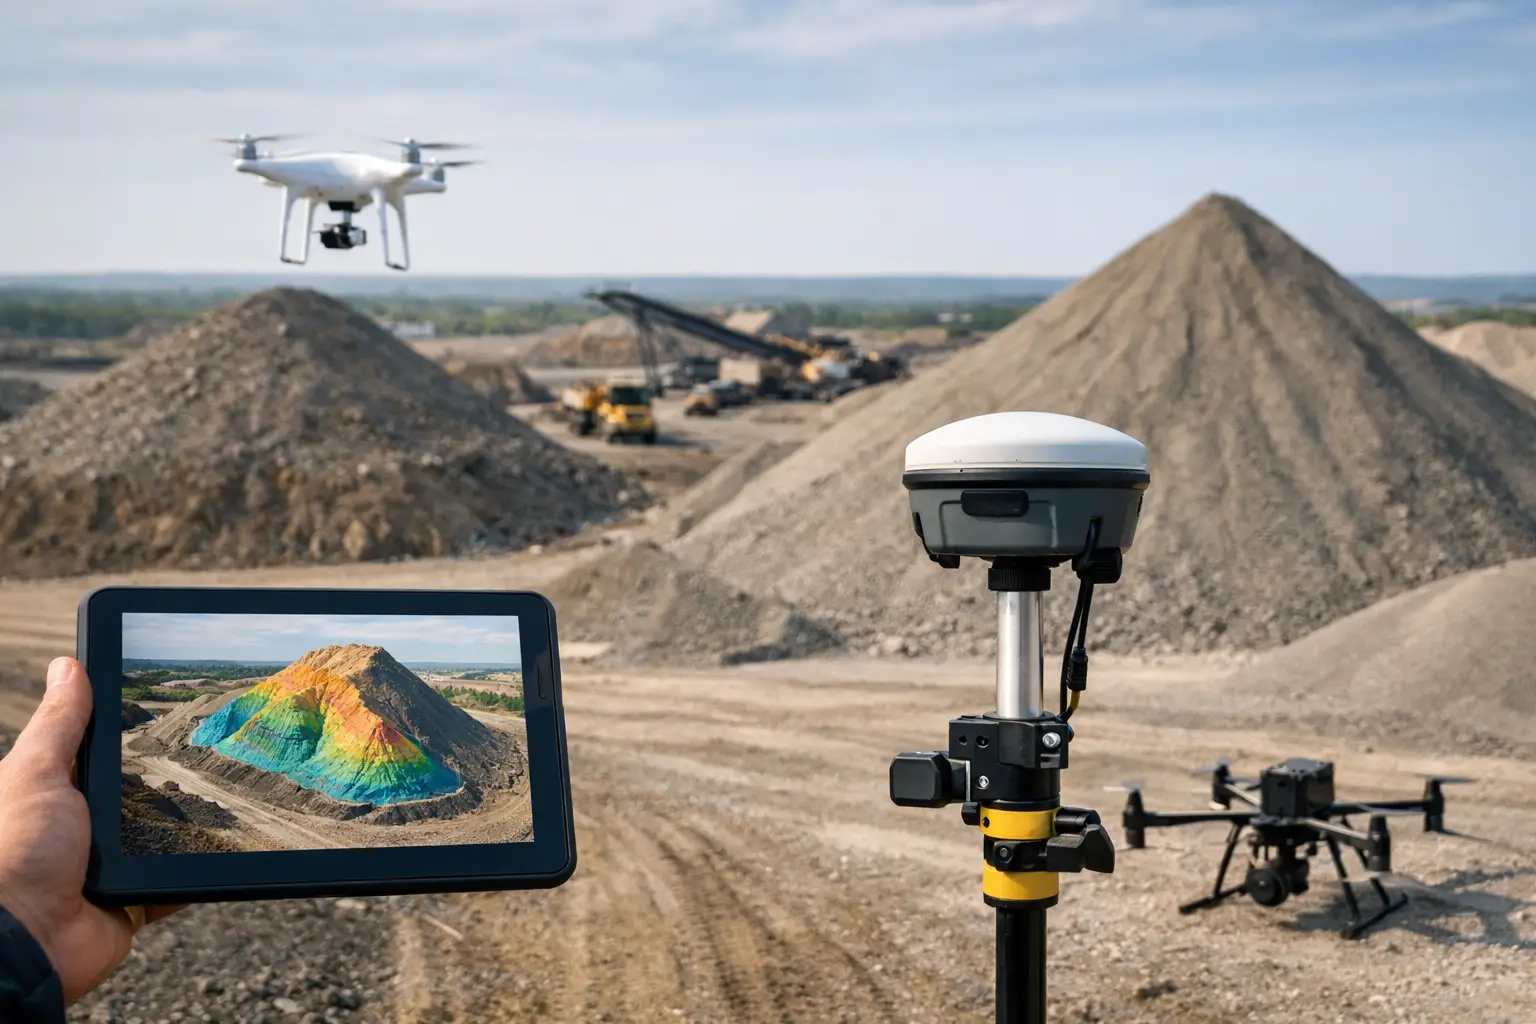
    Drone mapping captures a large volume of spatial data from above. Using photogrammetry or drone-mounted LiDAR, teams can produce orthomosaics, point clouds, surface models, contours, stockpile volumes and 3D meshes across substantial areas in a short field visit. This makes it particularly effective for topographic mapping, progress monitoring, quarry surveys, land management and inaccessible asset inspections.

    Ground survey measures selected points, lines and features directly from the site. GNSS/RTK rovers, total stations, terrestrial LiDAR scanners and conventional levelling techniques give surveyors close control over feature capture and coordinate quality. They remain the preferred choice where detail is obscured from the air, where levels must meet a tight tolerance, or where legal boundaries and setting-out decisions are involved.

    The difference is therefore not simply speed versus precision. Both can be highly accurate when specified, controlled and processed correctly. The real distinction is data density and perspective. A drone rapidly provides broad-area coverage and visual context. A ground crew can verify critical features at source and work around obstructions that aerial sensors cannot see through.

    Accuracy Depends on Control, Not the Platform Alone

    Claims that drones are inaccurate, or that ground methods are automatically more accurate, are both too simplistic. Accuracy depends on the sensor, flight or observation plan, coordinate reference system, site control, processing method and quality assurance.

    For drone photogrammetry, RTK positioning can improve image geotagging and reduce the number of ground control points needed. It does not remove the need for validation. Independently surveyed checkpoints are still the sound way to confirm that an orthomosaic or terrain model meets the required horizontal and vertical accuracy. Ground control is especially valuable on sites with changing elevation, weak GNSS conditions or a requirement for defensible survey reporting.

    Drone LiDAR can provide useful topographic data where photogrammetry struggles, particularly around partial vegetation cover. However, its results still need suitable GNSS and IMU performance, careful trajectory processing and ground checks. Dense woodland, steep terrain and poor satellite visibility can all affect the final dataset.

    Ground survey offers more direct control for individual features. A total station can capture a precise breakline, drainage channel, building corner or rail feature without relying on pixel matching or aerial visibility. Digital levels remain appropriate when transferring critical levels across a project. Where a specification calls for centimetre-level terrain data across a wide site, a controlled drone survey may be suitable. Where it calls for millimetre-level setting out or precise structural monitoring, conventional ground methods should lead.

    Coverage and Productivity on Large Sites

    This is where drone mapping has a clear operational advantage. A surveyor can collect imagery or LiDAR across areas that would take a ground crew many hours or days to traverse, particularly on rough, muddy or recently disturbed ground. The output is also richer than a sparse set of measured points: project teams receive a visual record of the site alongside measurable spatial data.

    For earthworks, landfill cells, aggregates, highways corridors and development sites, regular drone flights can establish a repeatable record of change. Comparing successive surface models helps quantify cut and fill, track stockpile movement and identify whether construction is progressing against the intended programme.

    Ground survey becomes comparatively time-consuming when the brief requires full coverage over a large open area. It is still highly effective for targeted work, such as capturing service chambers, kerbs, building thresholds, drainage inverts and other defined features. The productivity question is not whether a crew can measure these points, but whether it is commercially sensible to measure every metre of a site manually when aerial capture can provide the wider terrain model.

    Access, Safety and Site Constraints

    Aerial survey reduces exposure to hazards. It can capture roofs, unstable slopes, water margins, quarries, rail-adjacent areas and restricted zones without placing an operative directly in the hazard area. This is a significant benefit, but it does not mean drone operations are risk-free.

    UK drone work requires appropriate planning around airspace, people, structures, weather, take-off and landing areas, and the specific operating environment. Wind, rain, low light and poor visibility can delay missions. A site near an airport, prison, critical infrastructure location or busy public area may require additional permissions, coordination or a different survey approach.

    Ground survey can continue in places where a drone cannot operate, but it introduces its own risks. Survey teams may face moving plant, uneven ground, traffic, water, confined spaces or difficult access. A sensible method statement considers the hazards of both approaches rather than assuming the airborne option is automatically safer.

    Vegetation, Obstructions and Feature Visibility

    Photogrammetry works best when the ground surface is visible from above. Long grass, crops, scrub, standing water, shadows and reflective materials can reduce the quality of an aerial terrain model. It may produce an attractive image while failing to represent the true ground level beneath vegetation.

    LiDAR is often the stronger drone option for corridors and woodland because laser pulses can return from gaps in the canopy. Even then, dense vegetation is not a guarantee of complete ground penetration. Classification needs experienced processing, and critical areas should be checked on the ground.

    Ground survey is the practical answer for hidden detail. Surveyors can measure beneath canopies, around building overhangs and inside areas where line-of-sight permits. Terrestrial LiDAR can also capture façades, plant rooms, structures and complex built assets with far greater detail than an overhead drone flight. For many sites, drone data maps the open ground while targeted ground observations close the gaps.

    Deliverables Should Drive the Method

    Before selecting equipment or appointing a survey provider, define the output that the design, commercial or asset-management team actually needs. A planning team may need a current orthomosaic and a broad topographic model. A quantity surveyor may need a verified stockpile volume. A civil engineer may need CAD-ready breaklines, spot levels and drainage features. An asset manager may need a colourised point cloud or inspection imagery.

    Drone mapping is well suited to large-area deliverables: orthomosaics, digital surface models, digital terrain models, contours, volumetrics and visual 3D models. Ground survey is typically better for detailed CAD feature capture, setting out, monitoring points and surveys of obscured or internally located assets.

    The final deliverable must also be understood in context. A high-density point cloud is not automatically a usable design model. It needs the correct coordinate system, filtering, classification, validation and export format. The value lies in data that can be used confidently in CAD, GIS, BIM or engineering workflows, not simply in collecting more points.

    Cost: Compare the Whole Workflow

    A drone survey can reduce field time substantially, but the cheapest flight is not always the lowest-cost survey. Costs can rise when control is inadequate, processing is poorly specified, access planning is overlooked or the required outputs have to be recreated manually afterwards.

    Likewise, sending a ground crew to capture a few hundred points may be economical for a compact site with a clear, defined brief. It becomes less attractive when the site is extensive, hazardous or requires repeat measurement every fortnight. The right comparison includes mobilisation, field time, permissions, control, processing, quality checks, deliverable preparation and the cost of rework.

    Organisations purchasing their own systems should also consider training, operational procedures, correction services, processing software and technical support. Enterprise drone and GNSS equipment performs best as part of a complete survey workflow, not as an isolated hardware purchase.

    A Combined Survey Workflow Usually Produces the Best Result

    For many UK construction, infrastructure and land projects, a hybrid method is the most commercially sound approach. Establish survey control with GNSS, total station or levelling methods. Use the drone to capture efficient site-wide imagery or LiDAR. Validate the aerial model against independent checkpoints, then supplement hidden, critical or tolerance-sensitive features with ground observations.

    This approach provides broad coverage without losing confidence in key measurements. It also gives project teams a current visual record while supplying survey-grade data for design and commercial decisions. The method can be repeated throughout the programme, creating consistent datasets rather than disconnected site snapshots.

    LiDAR Tech UK supports this type of workflow through professional drone, GNSS/RTK and LiDAR solutions, backed by technical guidance, training and survey data services. The right starting point is a clear definition of the decision the data needs to support, the tolerance that decision demands and the conditions found on site. Once those are known, the appropriate balance between aerial and ground capture becomes much easier to specify.

  • LiDAR Versus Photogrammetry Surveying

    LiDAR Versus Photogrammetry Surveying

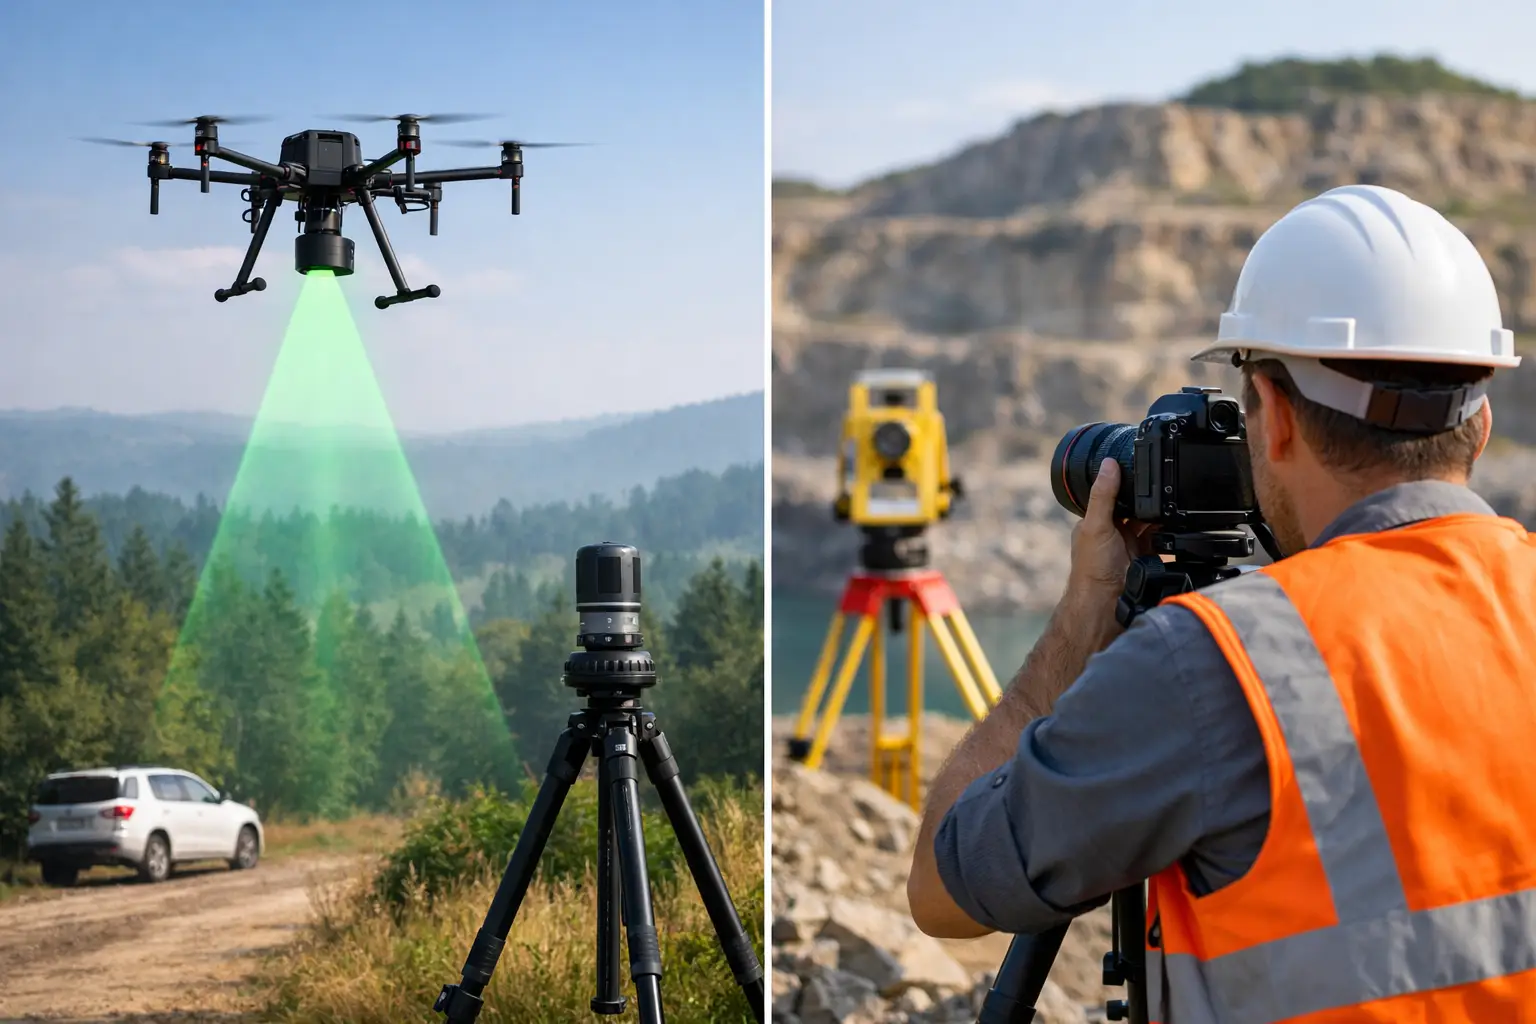
    When a project team asks for a topographic survey, stockpile calculation or site model, the real question is often not whether to capture data digitally. It is whether LiDAR versus photogrammetry surveying is the better fit for the job. That decision affects accuracy, field time, processing effort, site access, and ultimately whether the final dataset is genuinely useful for design, construction or asset management.

    Both methods are proven. Both can produce detailed deliverables. But they work in very different ways, and the right choice depends on the environment, the required outputs and the level of certainty your project demands.

    LiDAR versus photogrammetry surveying – what is the difference?

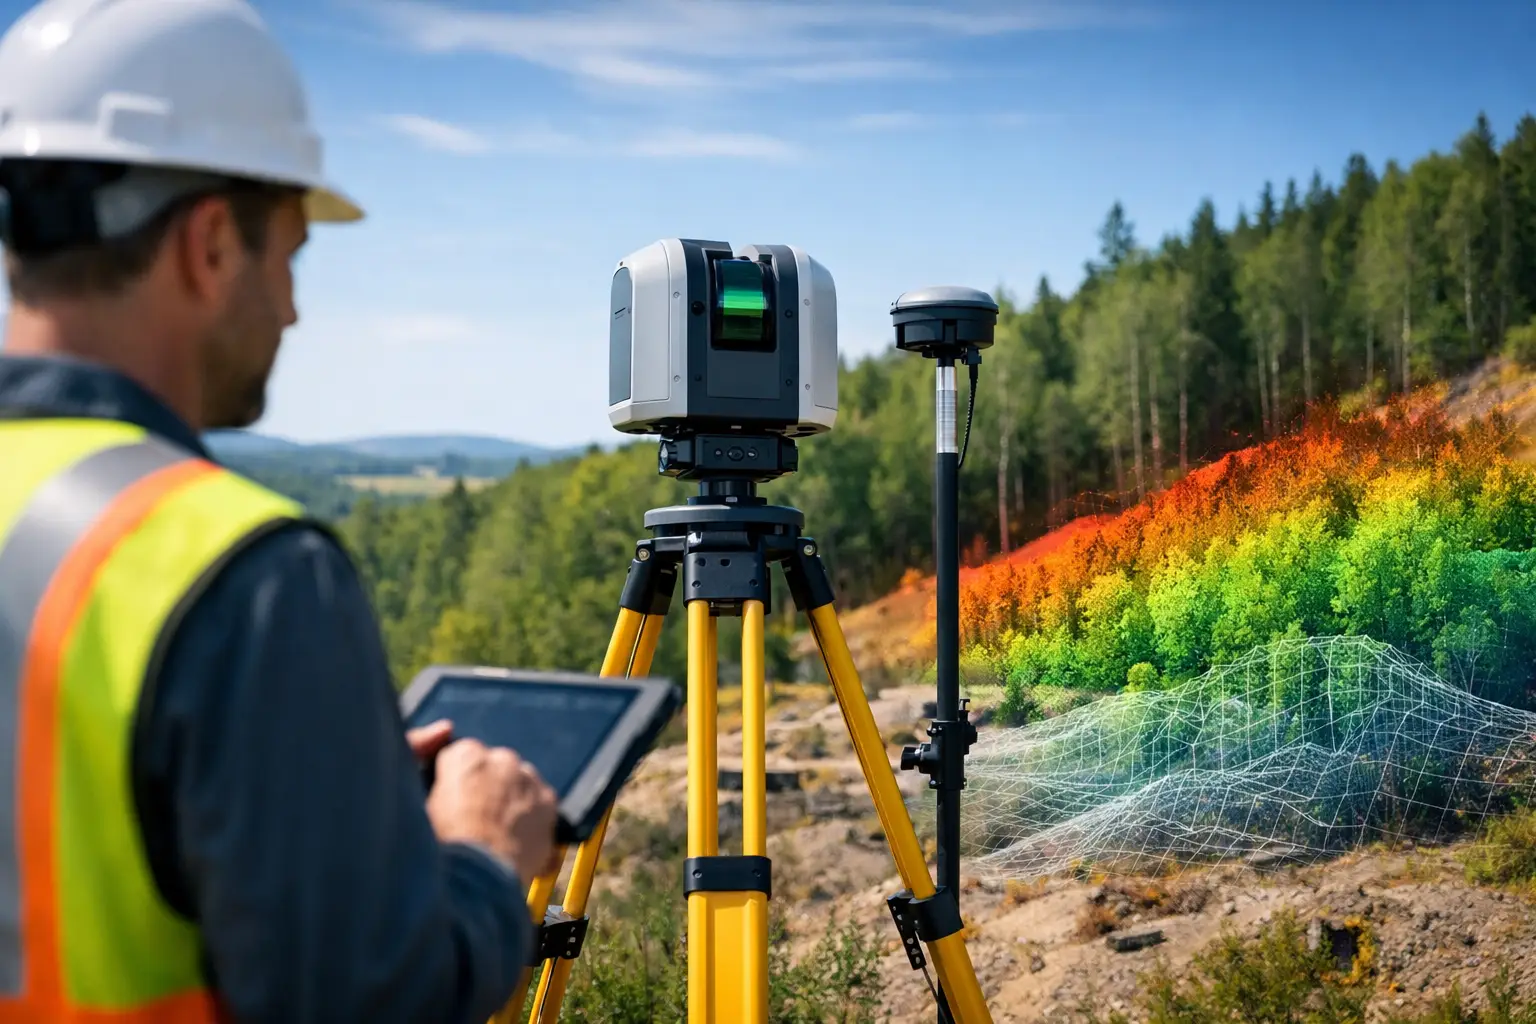
    LiDAR measures distance directly using laser pulses. A scanner, whether terrestrial, mobile or drone-mounted, records millions of points and creates a dense 3D point cloud. Because it is an active sensor, it does not rely on ambient light in the same way a camera-based workflow does.

    Photogrammetry uses overlapping images to reconstruct geometry. Specialist software identifies common points across multiple photographs and calculates their position in 3D space. The result can include point clouds, orthomosaics, textured meshes and surface models.

    For many buyers, the practical distinction is straightforward. LiDAR captures shape by measuring it. Photogrammetry estimates shape by matching imagery. Both approaches can achieve strong results, but one may be more dependable than the other depending on vegetation, texture, lighting and the amount of geometric complexity present on site.

    Where LiDAR has the advantage

    LiDAR is often the stronger choice where geometry matters more than visual appearance. On infrastructure corridors, construction sites, rail environments, quarries and complex industrial assets, laser scanning can deliver highly consistent spatial data with less dependence on surface texture.

    It also performs well in low-texture environments where photogrammetry can struggle. A concrete wall, a uniform road surface or repetitive structural elements may not provide enough visual detail for stable image matching. LiDAR does not have the same limitation because it is recording range directly.

    Vegetation is another key factor. If the requirement is to model the ground beneath tree cover, LiDAR generally has a clear operational advantage. Depending on the sensor, platform and survey design, laser pulses can produce returns from vegetation and from the ground below, making it possible to classify terrain more effectively than with image-only methods.

    This matters in forestry, utilities, land development and flood-risk work, where a surface model of the canopy is not enough. If your team needs a more reliable terrain representation through partial cover, LiDAR is usually the safer technical choice.

    Where photogrammetry makes sense

    Photogrammetry remains highly effective for many commercial surveying tasks, particularly where visual context is valuable and surface visibility is good. For roofs, façades, earthworks, open sites and heritage documentation, image-based capture can provide detailed and visually rich outputs.

    It is also well suited to clients who need orthomosaics, inspection imagery or textured 3D models as part of the deliverable, not just geometry. A well-planned drone photogrammetry survey can cover large areas efficiently and produce outputs that are easy for non-specialist stakeholders to interpret.

    On straightforward open-ground sites, photogrammetry can be a cost-effective option when supported by proper ground control and a disciplined processing workflow. If the project tolerance allows it and the surface conditions are favourable, it can provide the required data without the additional hardware cost associated with LiDAR payloads.

    Accuracy is not just about the sensor

    One of the most common mistakes in LiDAR versus photogrammetry surveying comparisons is to treat accuracy as a headline figure taken from a brochure. In practice, survey accuracy depends on the entire workflow.

    Control strategy, GNSS performance, RTK or PPK correction quality, flight planning, scan geometry, overlap, calibration, target placement and processing discipline all influence the result. A poorly controlled LiDAR survey can underperform. A well-executed photogrammetry project can exceed expectations.

    That said, LiDAR usually offers a more predictable route to dependable geometry on complex sites. It is less vulnerable to poor texture and variable lighting, and it tends to produce stronger results where vertical surfaces, narrow structures or obscured ground are involved.

    Photogrammetry can achieve very good absolute accuracy, especially on accessible sites with strong control. But it is more sensitive to environmental conditions and capture quality. Shadows, reflective surfaces, water, repetitive patterns and moving objects can all degrade model reliability.

    Speed in the field versus time in processing

    Field productivity is often a deciding factor for contractors and survey managers. Drone-based photogrammetry can cover large sites quickly, especially where access is uncomplicated and line of sight is good. For visual mapping over open ground, it remains an efficient option.

    LiDAR can also be extremely fast in the field, particularly with mobile or drone-mounted systems, and terrestrial scanners can capture complex structures with high density in relatively short site windows. On active sites where possession time is limited or where safety constraints restrict repeat visits, that efficiency has real commercial value.

    Processing time is where the balance can shift. Photogrammetry datasets can require substantial computation, careful quality checks and occasional rework if image alignment issues emerge. LiDAR processing also requires expertise, particularly for registration, classification and noise reduction, but the underlying geometry is often more stable from the outset.

    For businesses working to fixed delivery dates, the most efficient method is not always the cheapest to deploy. It is the method most likely to produce usable outputs first time.

    Cost comparisons need context

    Photogrammetry is often described as the lower-cost option, and in some cases that is true. Camera payloads are generally more accessible, and for open-area mapping the data capture workflow can be commercially attractive.

    However, project cost should be assessed against risk, rework and output quality. If a photogrammetry survey has to be repeated because of poor tie point generation, inadequate ground definition or inconsistent results on vertical assets, the apparent saving disappears quickly.

    LiDAR systems typically involve higher equipment investment, but they can reduce uncertainty on technically demanding sites. For engineering surveys, as-built capture, vegetation-heavy environments or asset records where measurement confidence matters, the additional capability is often justified.

    Professional buyers usually make the right decision when they compare total project value rather than sensor price alone. The question is not which method is cheaper on paper. It is which method delivers the right data with the least operational risk.

    Choosing the right method for common UK applications

    For topographic surveys on open development land, either approach may be suitable. If the site is clear, well controlled and the required deliverables are surface-based, photogrammetry can perform well. If there is dense vegetation, uneven visibility or a need for stronger terrain confidence, LiDAR is likely to be preferable.

    For construction progress monitoring, photogrammetry is often attractive because it combines measurable outputs with imagery that project teams can review easily. Where the environment includes steelwork, vertical complexity or difficult access, LiDAR can improve reliability.

    For utilities and infrastructure, LiDAR often has the edge. Corridor environments, embankments, bridges, substations and transport assets benefit from dense 3D geometry and reduced dependence on surface texture. In many of these settings, the cost of missing detail is higher than the cost of using the stronger sensor.

    For forestry and rural land management, LiDAR is commonly selected when vegetation penetration and terrain modelling are important. Photogrammetry can still support canopy analysis and visual mapping, but it does not usually offer the same confidence in ground extraction beneath cover.

    For heritage and façade work, the answer depends on the output. If the client wants visual realism, photogrammetry has clear strengths. If dimensional certainty and complex geometry are the priority, LiDAR may be the better base dataset. In some cases, combining both produces the best result.

    When a hybrid workflow is best

    The most effective answer is not always LiDAR or photogrammetry. On many projects, it is LiDAR and photogrammetry.

    A hybrid workflow can pair the geometric strength of LiDAR with the visual richness of imagery. That is especially useful for assets that need accurate measurement and clear visual interpretation, such as buildings, industrial plant, infrastructure corridors and inspection targets.

    This is where an experienced delivery partner adds value. Sensor choice should follow the required outcome, not the other way round. LiDAR Tech UK supports clients across equipment supply and project delivery precisely because the best workflow is rarely decided by specification sheets alone. It is decided by what the site allows, what the end user needs, and how much certainty the project can afford to lose.

    What to ask before you choose

    Before committing to either method, define the deliverable first. Are you producing CAD-ready linework, a digital terrain model, an orthomosaic, a textured mesh, inspection imagery or a classified point cloud? Then look at site constraints such as vegetation, access, safety, vertical complexity and available control.

    Also consider who will use the data. A planning team, an engineering designer and an asset manager may all ask for a survey, but they often mean different things. The best capture method is the one aligned to the final decision the data needs to support.

    If your project has little tolerance for ambiguity, choose the workflow that reduces assumptions. That usually leads to better data, fewer return visits and stronger confidence when the survey moves from field capture into commercial decision-making.

  • How to Choose LiDAR Scanner for Your Work

    How to Choose LiDAR Scanner for Your Work

    A scanner that looks impressive on a spec sheet can still be the wrong fit on site. If you are working out how to choose lidar scanner equipment for surveying, construction, inspection or mapping, the real question is not which unit has the longest headline range. It is which system will deliver the data quality, speed and workflow your team actually needs, without creating delays in processing, training or deployment.

    For most professional buyers, the decision sits at the point where technical performance meets operational reality. Accuracy matters, but so do capture speed, GNSS integration, software compatibility, staff capability and after-sales support. A scanner that saves two hours in the field but adds a full day in the office is rarely the best investment.

    How to choose lidar scanner systems by application

    The first step is to define the job, not the device. A land surveyor documenting topography, a contractor measuring stockpiles, and an infrastructure team inspecting assets may all use LiDAR, but they will not need the same setup.

    If your work is mainly ground-based survey and measured building capture, you will usually prioritise point cloud quality, positional accuracy and clean registration. If your requirement is corridor mapping, large estates, forestry or inaccessible terrain, mobility and area coverage become more important. For construction progress monitoring, speed of repeat capture and straightforward outputs for CAD or BIM workflows often matter just as much as pure sensor specification.

    This is where many buying decisions go wrong. Businesses compare scanners as if there is a universal best option. There is not. There is only the best option for your sites, your deliverables and your team.

    Start with your required output

    Before comparing hardware, decide what the final deliverable needs to be. That could be a registered point cloud, a topographic model, a mesh, a digital twin, CAD linework, volumetric calculations or asset condition records.

    If the output must be survey-grade and defensible for engineering use, your tolerance for drift, noise and poor control will be low. If the aim is rapid situational awareness or visual documentation, a more mobile and lower-complexity system may offer better value. The scanner should be selected around the standard of output expected by clients, designers or project managers.

    Match the environment to the platform

    Open quarries, highways, rail corridors, dense woodland, industrial plants and urban streets all place different demands on LiDAR equipment. Long-range performance is useful in open environments, but in confined areas scanner size, line of sight and manoeuvrability can be more important.

    Indoor and mixed indoor-outdoor capture also needs careful thought. Some systems perform well when GNSS is strong but become less reliable in enclosed or signal-poor spaces. Others are designed to handle transitions more effectively. If your projects regularly move between external control and internal mapping, that handover matters.

    Accuracy, range and speed – what matters most?

    Professional buyers naturally focus on accuracy first, and rightly so. However, published accuracy figures need context. Manufacturers may quote relative accuracy, absolute accuracy, sensor accuracy or accuracy under ideal test conditions. Those are not interchangeable.

    The practical question is this: what accuracy can your team achieve repeatedly on real projects? That depends on the sensor, but also on control, GNSS conditions, trajectory quality, operator technique and processing workflow.

    Range should also be treated carefully. A long maximum range can be valuable for infrastructure, quarry or landscape applications, but if your projects are predominantly within shorter working distances, it may not be the feature that changes outcomes. In many cases, usable range and point quality at operational distances matter more than headline maximums.

    Capture speed is often undervalued at procurement stage. On busy sites, speed affects labour cost, possession time, safety exposure and disruption to operations. A faster system can improve commercial performance even if another model appears slightly stronger on one technical metric.

    Consider repeatability, not just peak performance

    A scanner should perform reliably in the hands of your team, across changing weather, varied terrain and realistic site pressures. If one system can achieve excellent results only with highly experienced operators and intensive post-processing, while another gives consistent, dependable outputs with less intervention, the second may be the stronger business choice.

    Mobility and workflow are often the deciding factors

    Many organisations no longer want a scanner in isolation. They want a workable capture ecosystem that includes positioning, software, training and support. That is especially true where teams need to move quickly from field collection to usable outputs.

    Handheld, mobile and backpack-style systems can offer major gains in productivity, particularly for larger areas or complex structures. Static scanning may still be the right approach for high-detail work and controlled environments, but it is slower and often more demanding in registration. The right balance depends on whether your priority is ultra-detailed local capture or efficient coverage across broad sites.

    Software should be part of the buying decision from the start. A scanner that creates friction in registration, georeferencing, classification or export can reduce its own value. Ask whether the data can move cleanly into your existing CAD, GIS, BIM or survey workflows. Also check how easily the system supports control points, GNSS corrections and deliverable generation.

    Think about staff adoption

    Even capable hardware can underperform if the system is difficult to learn or awkward to deploy. Training time, field procedures and user confidence all affect return on investment. A straightforward workflow often delivers better long-term results than a more complex option that promises slightly higher specification but sees limited use.

    Questions to ask before you buy

    When evaluating how to choose lidar scanner equipment, the strongest discussions usually focus on evidence rather than brochure claims. Ask suppliers to explain performance in your application, not just in generic terms.

    You should expect clear answers on achievable accuracy, typical productivity, GNSS and control options, processing software, deliverable compatibility and support arrangements. It is also worth asking how the system performs in weak GNSS conditions, around vegetation, on reflective surfaces and in mixed indoor-outdoor environments.

    A live demonstration or trial dataset is especially useful. It shows not only what the hardware can capture, but how efficiently the workflow produces something your team can use. For many buyers, that is where the real difference appears.

    Support, service and total cost of ownership

    Purchase price is only one part of the decision. Support quality affects uptime, deployment speed and confidence in the field. For business-critical equipment, responsive technical assistance can be as important as the scanner itself.

    Look at what is included beyond the hardware. That may cover software onboarding, operator training, calibration guidance, troubleshooting, firmware updates and access to correction services or compatible positioning tools. If your organisation is adopting LiDAR for the first time, implementation support can shorten the learning curve considerably.

    Total cost of ownership should also include accessories, licences, processing requirements and staff time. A lower-cost scanner may prove more expensive if it needs additional site time, heavier office processing or repeated rescans. Equally, a premium unit is not automatically better value if your projects do not require its full capability.

    For that reason, many buyers now prefer working with a specialist supplier that understands both the equipment and the survey outcomes. A company such as LiDAR Tech UK can support that decision more effectively because it sits across hardware, workflows, training and project delivery rather than simply shifting boxes.

    Common mistakes when choosing a LiDAR scanner

    One of the most common errors is buying for rare edge cases instead of routine work. If ninety per cent of your projects are medium-range survey and site documentation, it rarely makes sense to optimise the entire investment around the occasional extreme-distance requirement.

    Another is treating LiDAR as a standalone tool. In practice, the scanner, positioning method, software environment and deliverable requirements all affect success. If one part of that chain is weak, the rest of the investment suffers.

    There is also a tendency to overestimate how much complexity a team will absorb comfortably. The best system is not the one with the most features. It is the one that helps your team capture reliable data, repeatedly, at a commercial pace.

    A practical way to make the final decision

    Shortlist two or three systems that fit your typical projects, then compare them against the same criteria: output quality, field productivity, ease of use, software workflow, support and overall cost to deploy. Keep the comparison grounded in live project requirements rather than marketing language.

    If possible, test each option against a representative site. Measure not only the point cloud, but the total job from mobilisation through to final deliverable. That is the closest you will get to the real business case.

    The right scanner should reduce friction across your workflow, give your team confidence on site and produce data you can stand behind. If a system meets those tests, it is not just a good technical fit. It is a sound operational investment, and that is usually the clearest answer to how to choose lidar scanner equipment well.

  • How to Choose Survey Drone for UK Projects

    How to Choose Survey Drone for UK Projects

    A drone that looks impressive on a spec sheet can still be the wrong tool for a live survey contract. The real question in how to choose survey drone systems is not which aircraft has the longest list of features, but which platform delivers the accuracy, workflow and reliability your project demands.

    For professional buyers, that decision sits at the intersection of survey standards, site conditions, regulatory limits and commercial pressure. A construction firm may need fast topographic updates across active earthworks. A utilities team may prioritise safe asset inspection in difficult locations. A land survey practice may need repeatable outputs that drop cleanly into CAD or GIS workflows. The right drone depends on what you need to measure, how precisely you need to measure it, and how often you need to deploy.

    How to choose survey drone by project type

    Start with the end deliverable rather than the aircraft. If your goal is orthomosaics and surface models for stockpile checks, progress monitoring or general topographic mapping, a photogrammetry drone may be the most cost-effective route. If you need to penetrate vegetation, capture complex vertical structures, or reduce dependence on image overlap and ground texture, LiDAR becomes far more attractive.

    That distinction matters because it affects every buying decision that follows. Photogrammetry platforms are often simpler and lower cost, but they rely heavily on lighting conditions, good visual texture and disciplined flight planning. LiDAR systems are more specialised and command a higher investment, yet they can perform much better on wooded corridors, transmission routes, rail infrastructure and difficult terrain.

    There is also a middle ground. Some organisations need one platform for several departments. In that case, payload flexibility may matter more than absolute entry price. A modular enterprise drone that can support mapping, inspection and thermal missions can offer stronger long-term value than a lower-cost aircraft designed for only one task.

    Accuracy is not just a drone specification

    Many buyers focus first on RTK, PPK or claimed centimetre-level accuracy. Those are important, but they are not the full story. Survey accuracy depends on the whole measurement chain: GNSS correction quality, camera or sensor calibration, flight planning, ground control strategy, processing settings and operator competence.

    If you are producing outputs for engineering design, quantity calculations or measured surveys, ask what level of absolute and relative accuracy is required by your client or internal standard. Then check whether the proposed drone workflow can achieve that consistently, not just in ideal conditions. A platform with RTK can reduce the need for ground control, but it does not remove the need for validation. On some projects, independent check points remain essential.

    This is where professional support matters. A well-specified drone supplied with correction services, setup guidance and processing advice is usually a better investment than a higher-spec aircraft bought in isolation.

    RTK, PPK and ground control

    RTK gives real-time corrections during flight, which is useful for efficient field operations and fast turnaround. PPK can provide greater resilience where live correction links are weak or intermittent. Ground control still has a place, especially where contractual survey tolerances are tight or where site geometry makes validation more demanding.

    The practical answer is rarely one method only. Most professional workflows blend onboard positioning with sensible control and checking.

    Payload choice drives capability

    When buyers ask how to choose survey drone platforms, payload selection is often the decisive factor. The aircraft is the carrier. The sensor is what earns the result.

    For standard mapping, the quality of the RGB camera affects image sharpness, overlap efficiency and final model quality. A large sensor, mechanical shutter and stable gimbal are all worth attention. For inspection-heavy work, zoom capability and thermal imaging may be more relevant than pure mapping performance. For dense vegetation, utility corridors, forestry or detailed terrain modelling, LiDAR payloads can justify themselves quickly.

    However, higher capability brings higher weight, more complex workflows and greater processing demands. A LiDAR payload may transform what you can survey, but it also requires stronger expertise in calibration, strip alignment and point cloud handling. If your team is new to airborne data capture, there can be a clear business case for training or outsourced processing alongside the hardware purchase.

    Flight performance matters on real sites

    Published flight time is helpful, but it should not be taken at face value. Wind, payload weight, temperature and mission profile all reduce endurance. A drone quoted at 45 minutes may deliver considerably less on a cold, exposed UK site carrying a heavier survey payload.

    Look at practical productivity instead. How many hectares can it cover per sortie at the required ground sampling distance? How quickly can batteries be rotated? Can it maintain stable positioning in gusty conditions? Is the aircraft compact enough for teams moving between multiple locations in a day?

    Reliability also matters more than headline speed. Survey operations need repeatable flight paths, stable hover performance where required, and dependable obstacle sensing around structures and assets. For commercial users, downtime costs far more than a small difference in top speed or brochure range.

    Software and outputs should be part of the buying decision

    A survey drone is only one part of the workflow. The value sits in the output you can deliver to clients, design teams or asset managers. Before you buy, confirm how data moves from the aircraft into your processing environment and then into CAD, BIM, GIS or asset management systems.

    Some platforms are easier than others. A drone that captures excellent data but creates friction in processing can slow your team down and erode margins. Consider whether your operation needs cloud processing, desktop photogrammetry, LiDAR point cloud software, automated reporting or integration with existing geospatial tools.

    It is also worth checking whether your supplier can support the full chain. For many organisations, the best result comes from dealing with one specialist that understands aircraft, sensors, corrections, software and deliverables together. That reduces handoff problems and shortens the learning curve.

    UK compliance and operational practicality

    Any decision on how to choose survey drone equipment in the UK must account for regulation and deployment conditions. The right aircraft for a controlled test field may be awkward on a constrained construction site, around transport infrastructure or in urban environments.

    Consider the operational category, pilot competency requirements and site-specific permissions likely to apply to your work. If your team regularly operates near people, structures or sensitive assets, compliance planning becomes part of the business case. Larger and more capable systems can bring performance advantages, but they can also introduce more operational complexity.

    Weather resilience is another practical issue. Light rain resistance, ingress protection and wind tolerance can make a major difference over a full year of UK fieldwork. If your business cannot afford frequent weather-related delays, environmental durability should sit high on the shortlist.

    Support, training and service should not be afterthoughts

    For professional buyers, support is not a soft benefit. It is part of risk control. A drone system that is difficult to commission, hard to troubleshoot or poorly supported can lose time on site and compromise deliverables.

    Ask who provides onboarding, firmware support, repair handling, workflow advice and operator training. If your team is moving into LiDAR, RTK-enabled photogrammetry or enterprise inspections for the first time, implementation support can be just as important as airframe quality. LiDAR Tech UK, for example, operates in this space as both a technology supplier and a practical geospatial partner, which is often the difference between owning equipment and using it productively.

    This is especially relevant for organisations comparing online resellers against specialist providers. A lower purchase price can become expensive if it leaves your team unsupported when a live contract depends on the system.

    Cost should be measured over the workflow, not the invoice

    A sensible buying decision looks beyond capital cost. Batteries, controllers, chargers, software licences, correction services, training, maintenance and data-processing time all affect the real cost of ownership.

    There is also the cost of under-specifying. If a cheaper drone cannot meet required accuracy, lacks weather resilience or limits the type of jobs you can accept, it may become a false economy. Equally, over-specifying can tie up budget in capability you do not use. The best fit is usually the system that supports your current workload well and leaves enough headroom for the next stage of service growth.

    A practical way to decide

    If you are comparing options, narrow the decision to five questions. What output do you need to deliver? What level of accuracy must be achieved? What site conditions are typical? Who will operate and process the data? What level of support do you need after purchase?

    Those answers usually make the shortlist obvious. A simple photogrammetry workflow may be right for regular topographic updates and site progress. A modular enterprise platform may suit organisations balancing mapping and inspection. A LiDAR-enabled system may be the clear choice where vegetation, vertical assets or complex terrain repeatedly limit image-based surveying.

    The best survey drone is the one that fits your measurement standard, your commercial model and your field reality. If you choose with those three factors in mind, you are far more likely to buy a system that keeps delivering once the first demo flight is over.

  • How to Map Stockpiles Accurately

    How to Map Stockpiles Accurately

    Stockpile figures often look straightforward until they are challenged. A few per cent variance in volume can affect valuation, production reporting, contractor payment and site planning. That is why understanding how to map stockpiles accurately matters far beyond the survey team. It affects commercial decisions, operational timing and confidence in the numbers being reported.

    For most aggregate, waste, quarrying and construction sites, the old problem is not whether a stockpile can be measured. It is whether it can be measured quickly, safely and to a standard that stands up to scrutiny. Traditional methods still have a place, but they can be slow on busy sites and difficult around unstable slopes, uneven material surfaces or restricted access. Modern drone, GNSS and LiDAR workflows solve much of that, provided the survey is planned correctly from the start.

    How to map stockpiles accurately on active sites

    Accurate stockpile mapping begins before any flight or ground survey starts. The biggest errors usually come from poor control, weak surface capture or inconsistent processing rather than from the sensor alone. A good workflow needs to match the site, the material and the level of confidence required for the final volume.

    If the stockpile is small, isolated and easy to access, a GNSS rover survey may be sufficient. If the pile is large, steep or spread across a busy operational site, drone photogrammetry or LiDAR is often the more efficient option. The correct method depends on pile geometry, vegetation, surface texture, line of sight, required accuracy and whether the output needs to feed directly into CAD, earthworks software or reporting systems.

    Start with the required accuracy, not the equipment

    The first question should be commercial and technical at the same time: what level of accuracy is actually needed? A monthly site check may tolerate a wider margin than an end-of-quarter valuation or a dispute over delivered material. When that requirement is clear, the survey method can be specified properly.

    For some sites, centimetre-level accuracy is necessary and achievable with well-established GNSS control and a disciplined drone workflow. For others, relative consistency between repeat surveys matters more than the absolute figure from a single visit. That distinction is important. A repeatable method used correctly every month can be more valuable than a theoretically higher-accuracy setup used inconsistently.

    Control and positioning are where confidence is built

    If you want to know how to map stockpiles accurately, pay close attention to site control. Good ground control points, properly surveyed with RTK or established against a known coordinate system, anchor the whole dataset. Without reliable control, even high-quality imagery or LiDAR can produce surfaces that look convincing but fail when checked.

    On UK sites, a GNSS workflow should also account for signal conditions, nearby obstructions and whether a correction service provides stable coverage across the working area. Stockpiles near plant, conveyors, buildings or steep quarry faces can introduce complications. In those environments, survey control needs to be set with care, and check points should be used to verify the final model rather than relying on assumed performance.

    Choosing the right capture method

    There is no single best sensor for every stockpile. The practical question is which capture method gives the right balance of speed, surface definition and accuracy for the site conditions.

    Drone photogrammetry

    Photogrammetry remains an efficient option for open stockpiles with clear texture and good visibility. It is well suited to aggregate yards, bulk earthworks and materials that present enough visual detail for image matching. It can cover large areas quickly and produce orthomosaics, contours and volumetric models from one flight.

    Its limitation is that it depends on image quality and surface visibility. Uniform materials, reflective surfaces, deep shadows or poor lighting can reduce model quality. Steep pile faces can also be problematic if flight planning does not capture enough overlap and angle variation.

    LiDAR scanning

    LiDAR is often the stronger choice where surface texture is weak, geometry is complex or speed on a constrained site is a priority. It can perform well in lower-texture environments and can provide dense point clouds that capture steep or irregular surfaces more reliably than image-only methods.

    That does not mean LiDAR removes all survey risk. Calibration, trajectory quality, GNSS performance and processing discipline still matter. But on difficult sites, especially where repeatable high-density surface capture is needed, LiDAR can significantly improve confidence and reduce rework.

    Ground-based GNSS or total station survey

    For smaller piles or verification work, a ground survey remains useful. It can be cost-effective for targeted checks, especially where access is safe and the number of stockpiles is limited. The trade-off is speed and coverage. Sparse points can miss subtle changes in shape, and sending personnel onto or around unstable piles is not always acceptable from a safety perspective.

    Field practice that improves stockpile accuracy

    The gap between a good survey and a poor one is often in the field method. Flight altitude, overlap, scan density, control placement and site timing all influence the result.

    Survey timing matters more than many teams allow for. Freshly worked stockpiles can change shape within hours. Heavy vehicle movement, active loading and wind-blown surfaces can alter profiles enough to affect volume comparisons. If the survey is part of a reporting cycle, it should be scheduled against site activity so the measured condition reflects the commercial reporting point.

    For drone work, overlap should be planned conservatively, particularly around steep faces. Nadir imagery alone may not capture the full shape of a pile with sharp edges or underdefined slopes. Oblique passes can improve model quality. Consistent lighting also helps. Harsh shadow boundaries make surface reconstruction less reliable, especially on dark materials.

    For LiDAR, maintain a clean acquisition path and verify trajectory quality before leaving site. If the sensor platform suffers from weak GNSS lock or poor movement control, the resulting point cloud can drift or soften around edges. A fast survey is only useful if it does not need repeating.

    Processing volumes without introducing new errors

    Accurate capture is only half the job. Volume outputs depend on how the data is classified, cleaned and referenced to a base surface. Poor processing can introduce more error than the field survey itself.

    The first issue is the base. Stockpile volume is calculated against a reference surface, and that surface must be defined consistently. If different operators use different toes, breaklines or historical surfaces, the reported volumes will vary even when the stockpile has not changed materially. That is why repeat surveys need a standardised method for defining boundaries and base models.

    The second issue is noise and unwanted points. Plant, conveyors, edge clutter and stray returns can distort the model if they are not removed. This is particularly relevant on busy industrial sites where stockpiles sit close to infrastructure. Clean classification and sensible editing are essential if the output is going into commercial reporting.

    Quality checks that should not be skipped

    A professional workflow should include independent checks. Compare control and check point residuals, review cross-sections through the pile, inspect edge definition and sense-check the volume against previous surveys or operational records. If a pile appears to have grown sharply with no matching production activity, that is worth investigating before the figure is issued.

    This is also where experienced processing support adds value. Professional buyers do not just need data capture. They need confidence that the result is defensible, repeatable and suitable for decision-making.

    Common reasons stockpile surveys go wrong

    Most stockpile mapping problems are avoidable. Weak ground control, poor flight planning, insufficient surface coverage and inconsistent base definition are common causes. So is choosing technology on headline specification alone rather than on operational fit.

    A drone may be the fastest option on paper, but if the site is congested, the material lacks texture and the required output is high-confidence monthly reporting, LiDAR may be the better choice. Equally, deploying an advanced LiDAR setup for a handful of small, accessible piles may add cost without enough benefit. It depends on the site, the reporting requirement and how often the survey is repeated.

    For buyers assessing equipment or outsourced survey support, the key question is not only what the hardware can do. It is whether the full workflow – positioning, capture, processing and deliverables – is set up to produce reliable volume figures under real site conditions.

    How to build a repeatable stockpile workflow

    The most effective stockpile operations treat surveys as a standard process rather than a one-off task. Establish site control once, define reporting boundaries clearly, use the same capture parameters where practical and document processing rules. That creates consistency across teams and reporting periods.

    For organisations managing multiple sites, standardisation becomes even more important. Different operators, sensors and processing staff can all introduce variation. A managed workflow supported by the right GNSS, drone or LiDAR platform reduces that risk and shortens the path from field capture to usable outputs. This is where a supplier with practical deployment and data-processing experience can be more useful than a box-shifter. LiDAR Tech UK supports clients not only with hardware, but with implementation, training and survey delivery aligned to operational outcomes.

    When stockpile figures feed directly into valuation, programme management or production reporting, accuracy is not a technical extra. It is part of running the site properly. The best approach is the one that gives you repeatable numbers, clear auditability and enough confidence to act on the result the first time.

  • When Should Surveyors Use LiDAR?

    When Should Surveyors Use LiDAR?

    A site with broken ground, dense vegetation and restricted access will expose the limits of conventional methods very quickly. That is usually the point where the question shifts from whether LiDAR is useful to when should surveyors use LiDAR as the primary capture method. For many professional teams, the answer comes down to speed, safety, surface complexity and the level of detail the client actually needs.

    LiDAR is not a universal replacement for total stations, GNSS or photogrammetry. It is a high-value tool when project conditions reward rapid 3D capture, repeatable coverage and reduced time on site. Used in the right setting, it can shorten field programmes, improve site safety and deliver denser datasets for design, measurement and asset records.

    When should surveyors use LiDAR on a project?

    Surveyors should use LiDAR when conventional workflows become too slow, too risky or too limited for the job in hand. That commonly includes topographic surveys over large or uneven ground, corridor mapping, stockpile measurement, façade and building documentation, vegetation-covered terrain, and asset inspection where physical access is poor.

    The core advantage is data density. Instead of recording selected points, LiDAR captures a detailed point cloud across the site or structure. That changes what the survey team can deliver afterwards. Measurements that were not specified on day one can often still be extracted later, which reduces return visits and gives design teams more complete context.

    Just as important is speed. Mobile, handheld, terrestrial and drone-based LiDAR systems can cover substantial areas in less time than traditional point-by-point methods. On active construction sites, rail environments, highways and utility corridors, less time in the field often means lower operational disruption and lower exposure to hazards.

    The clearest use cases for LiDAR

    Large areas where speed matters

    If the brief involves extensive coverage and a compressed programme, LiDAR is often the stronger option. Walking a site with a scanner or flying a LiDAR-equipped drone can capture terrain and features far faster than relying purely on manual observation and discrete measurements.

    This matters for land development, route planning and pre-construction surveys. When teams need accurate ground models quickly to support design decisions, LiDAR can improve both productivity and turnaround. The commercial value is straightforward – more area captured per day, with fewer gaps in the dataset.

    Complex surfaces and irregular geometry

    Retaining walls, embankments, bridge elements, pipework, plant rooms and heritage structures are difficult to represent properly with sparse point collection. LiDAR performs well where shape matters. The denser the geometry, the more value there is in collecting a continuous 3D record rather than isolated shots.

    For measured building surveys and as-built documentation, this is especially relevant. Design and engineering teams often need more than coordinates. They need spatial relationships, deformation evidence and reliable dimensional detail. LiDAR supports that level of capture far better than a minimal point-based approach.

    Vegetated or obstructed terrain

    One of the strongest arguments for LiDAR is its performance in environments where photogrammetry struggles or line of sight is inconsistent. In woodland, overgrown boundaries, embankments and undeveloped land, LiDAR can help identify terrain beneath vegetation, particularly when deployed from airborne platforms and processed correctly.

    That does not mean every wooded site automatically requires LiDAR. Density of canopy, scanner specification, flight planning and target accuracy all affect results. Even so, where ground extraction through vegetation is a project requirement, LiDAR is often the more dependable route.

    Hazardous or hard-to-access locations

    Surveyors should use LiDAR where reducing physical exposure is a priority. This includes quarries, unstable slopes, highways, rail corridors, roofs, façades, substations, water margins and industrial facilities with operational constraints.

    Remote capture keeps personnel out of live or difficult areas for longer periods. Drone LiDAR and long-range terrestrial scanning are particularly useful here. In many cases, the safety case is as strong as the productivity case. If a site can be surveyed accurately without placing staff close to moving plant, traffic or fragile edges, that is a serious operational advantage.

    When LiDAR is better than photogrammetry

    Photogrammetry remains an effective and cost-efficient method for many surveys, especially where high-quality imagery, good texture and clear overlap are achievable. However, it is not always the best fit.

    LiDAR tends to outperform photogrammetry when the site has poor visual texture, variable lighting, vegetation cover or a need for dependable geometric capture in complex environments. It also avoids some of the reconstruction weaknesses that appear in repetitive or reflective surfaces.

    That said, there are projects where photogrammetry is entirely sufficient, or where a combined approach produces the best result. Imagery adds visual context, while LiDAR supplies reliable geometry. For commercial buyers, the right question is not which technology sounds more advanced. It is which workflow meets the required accuracy, output and budget with the least operational friction.

    When LiDAR is not the best choice

    Small, simple surveys with limited output needs

    If the job is a straightforward boundary check, a small setting-out exercise or a basic topographic task with limited feature complexity, LiDAR may be unnecessary. Traditional total station and GNSS workflows can be more economical and entirely adequate.

    The decision should reflect the output specification. If the client only needs a modest number of verified survey points or simple CAD linework, generating a full point cloud may add processing overhead without adding enough value.

    Projects with tight budgets and no need for dense data

    LiDAR can reduce field time, but it also introduces equipment cost, processing requirements and data management considerations. For lower-value projects with basic deliverables, that trade-off may not stack up.

    Professional buyers should look beyond capture speed alone. The full workflow matters – acquisition, control, registration, classification, modelling and final deliverables. LiDAR is strongest when the project can make commercial use of that richer dataset.

    Environments where control and specification are poorly defined

    LiDAR is not a shortcut around survey discipline. If control is weak, coordinate requirements are unclear or the expected accuracy has not been properly specified, a LiDAR workflow can produce a large volume of data without producing decision-grade results.

    This is why implementation matters. Equipment capability is only part of the equation. Survey control, calibration, platform choice and processing standards determine whether the output is fit for engineering, planning or asset management use.

    Choosing the right LiDAR method

    Terrestrial LiDAR

    Static terrestrial scanning suits detailed capture of buildings, façades, plant, interiors and fixed infrastructure. It is well suited to high-detail as-built work where accuracy and completeness are more important than maximum area coverage.

    Mobile and handheld LiDAR

    Mobile systems are effective for rapid site walks, indoor-outdoor transitions, warehouses, construction progress and areas where speed is critical. They can be very efficient, though expected tolerances and loop closure performance should always be matched to the job.

    Drone LiDAR

    Drone-mounted LiDAR is often the strongest option for large, inaccessible or vegetated areas. It is widely used for topography, utilities, forestry, corridors and volumetric work. Flight planning, scan density and GNSS/RTK performance remain central to final quality.

    A practical test for deciding when should surveyors use LiDAR

    A simple decision framework helps. Surveyors should lean towards LiDAR when four factors are present at once: the site is large or complex, physical access is difficult, the required output benefits from dense 3D data, and programme pressure makes long field sessions undesirable.

    If only one of those factors applies, LiDAR may still be suitable, but the case is weaker. If three or four apply, LiDAR is usually worth serious consideration. That is where it moves from interesting technology to a practical commercial tool.

    For organisations managing repeated surveys across construction, infrastructure or land assets, standardising a LiDAR workflow can also improve consistency between projects. The benefit is not just faster capture. It is a more reliable path from field data to usable deliverables.

    LiDAR Tech UK works with clients who need that decision to be based on specification and outcome, not guesswork. Whether the requirement is equipment supply, deployment advice or outsourced capture, the right answer starts with the survey objective.

    The most effective surveying teams do not ask whether LiDAR is fashionable. They ask whether it will give them safer capture, better data and a stronger result for the client – and that is usually the right moment to use it.

  • Digital Twin Survey Workflow That Scales

    Digital Twin Survey Workflow That Scales

    A digital twin survey workflow succeeds or fails long before any point cloud is processed. If the brief is vague, control is inconsistent or outputs are not matched to operational use, even high-quality capture can produce a model that looks impressive but delivers little value. For survey teams, contractors and asset owners, the real question is not whether to build a digital twin. It is how to create one through a repeatable workflow that supports design, inspection, maintenance and decision-making.

    For most organisations, a digital twin is not a single file or visualisation. It is a structured representation of a real asset or environment, built from reliable survey data and maintained in a form that other teams can use. That may mean a registered point cloud for BIM coordination, a textured mesh for site context, an inspection-grade model for condition assessment, or a combined dataset that supports asset management over time. The workflow matters because every later decision depends on what happened at capture stage.

    What a digital twin survey workflow needs to achieve

    A workable digital twin survey workflow has to balance speed, accuracy, coverage and output requirements. Those priorities change by sector. A heritage project may place more emphasis on geometric fidelity and visual detail. A utilities client may care more about positional confidence, repeat visits and clear asset attribution. A construction team may need rapid turnaround and easy coordination with design models.

    That is why the first stage is definition, not scanning. Before fieldwork begins, the survey specification should set out the required level of detail, tolerances, site constraints, coordinate system, control method, file formats and intended use. If the final deliverable is only described as a 3D model, there is too much room for error. A digital twin intended for clash detection, stockpile measurement and façade inspection will not be captured or processed in the same way.

    This early stage is also where equipment choice becomes commercial, not just technical. Static LiDAR, mobile scanning, RTK GNSS, UAV photogrammetry and drone LiDAR each have strengths. No single method is best in every environment. Large external sites often benefit from drone-based coverage and GNSS control, while plant rooms, corridors and complex structures may require terrestrial or handheld LiDAR to achieve suitable density and line-of-sight coverage.

    Planning the digital twin survey workflow on site

    Once the brief is fixed, survey planning becomes a matter of controlling risk. Site access, safety, obstructions, lighting, vegetation, weather and live operations can all affect data quality. A workflow that works well on a vacant development plot may struggle on an active infrastructure site with restricted windows and moving machinery.

    Control strategy is usually where reliable projects separate from rushed ones. If the aim is an accurate and repeatable digital twin, survey control should never be treated as an afterthought. Ground control points, check points and GNSS observations provide the reference needed to place datasets correctly and verify results. In some projects, local coordinates are enough. In others, especially where the model will support broader asset management or future revisits, tying the survey to a recognised grid is the better decision.

    Coverage planning also needs discipline. Overlap is essential, but excessive duplication increases processing time without always improving the final model. The right approach is to plan capture paths and scanner positions around surfaces that matter, areas of occlusion and the required output resolution. Survey teams who understand downstream use will make better field decisions than teams focused only on collecting as much data as possible.

    Capture methods and where each fits

    The capture stage of a digital twin survey workflow is usually a blend of technologies rather than a single instrument pass. Terrestrial LiDAR remains strong for high-detail structural capture, especially where geometry is complex and access is controlled. Mobile LiDAR can improve efficiency across long corridors, road sections, warehouses and large building interiors where speed is important. Drone photogrammetry is often the most cost-effective choice for roofs, elevations, quarries, earthworks and broad topographic context. Drone LiDAR becomes more attractive when vegetation penetration, difficult terrain or reduced dependence on image texture are important.

    There are trade-offs in every combination. Faster capture can mean more noise, more drift risk or lower feature detail. Higher accuracy often means more control, more setup time and more deliberate coverage planning. Dense point clouds can be valuable, but only if the density supports a clear purpose. Capturing millions of extra points that no one uses is rarely efficient.

    For many UK projects, a hybrid workflow gives the best result. GNSS and RTK establish control. UAVs cover inaccessible or large external zones. LiDAR scanners capture detail in structures and critical assets. The result is a more complete digital twin, but it also places more pressure on registration and quality assurance later in the workflow.

    Processing, registration and quality control

    Processing is where raw survey data either becomes a dependable digital asset or starts to lose credibility. Registration is not just a software task. It is a quality-critical step that determines whether multiple scans, flights or sessions align correctly enough for the intended use.

    Good registration practice combines automated tools with survey judgement. Cloud-to-cloud methods can be efficient, but they should not replace control and verification where accuracy matters. Residuals, check points and independent comparisons all help confirm whether the dataset performs to specification. If the model will support design coordination or dimensional extraction, small registration errors can become expensive later.

    Noise reduction, classification and cleaning also need restraint. Over-processing can remove useful features or smooth geometry that should remain sharp. Under-processing leaves clutter that affects modelling and interpretation. The right balance depends on the deliverable. An engineering survey for measured dimensions requires a different treatment from a visual digital twin for stakeholder review.

    At this stage, metadata matters more than many clients realise. Recording when the site was surveyed, what control was used, which areas were excluded and what tolerances were achieved helps protect the long-term value of the dataset. A digital twin is only as trustworthy as the information that supports it.

    Turning survey data into usable deliverables

    The strongest digital twin survey workflow does not stop at a registered point cloud. It translates survey data into outputs that other teams can use without reinterpretation. Depending on the brief, that could include CAD linework, BIM-ready models, terrain surfaces, orthomosaics, inspection imagery, cross-sections, feature extractions or mesh models.

    This is where many projects either generate operational value or create friction. If design teams receive data in the wrong format, or asset managers receive a model with no meaningful structure, the digital twin becomes a visual archive rather than a working resource. Output specification should therefore reflect software environment, naming conventions, level of detail and update requirements from the start.

    It also helps to distinguish between visual completeness and survey suitability. A polished model can still be weak for measurement if control and accuracy are not proven. Equally, a point cloud that looks less refined on screen may be the better engineering deliverable if its positional quality is well evidenced.

    Why workflow design affects long-term asset value

    A digital twin has more commercial value when it can be updated, compared and reused. That depends on consistency. If each survey visit uses different control, different capture extents or different modelling assumptions, change detection becomes difficult and confidence drops. Repeatability is what turns one survey into an operational dataset.

    For infrastructure, utilities, estates and industrial sites, the long-term benefit often comes from this repeatability rather than from the initial model alone. Once a survey workflow is standardised, future inspections, expansion works and compliance checks become faster and more defensible. The asset owner is no longer starting from zero every time conditions need to be assessed.

    That is also why service support and implementation guidance matter. The right hardware can significantly improve field efficiency, but equipment on its own does not create a reliable digital twin workflow. Teams need suitable control methods, processing discipline, output standards and practical training. For organisations building internal capability, or for those outsourcing delivery, the best results come from aligning technology with a clear survey method rather than treating the digital twin as a software problem.

    For buyers assessing options, the useful question is simple: will this workflow produce repeatable, analysis-ready data for the way the asset will actually be managed? If the answer is unclear, the specification needs more work before the first scan is taken.

    A digital twin should reduce uncertainty, not add another layer of it. When the survey workflow is planned properly, the outcome is not just a model. It is a dependable spatial record that supports faster decisions, safer operations and better control over the asset long after the site team has left.

  • Guide to Measured Building Surveys

    Guide to Measured Building Surveys

    A refurbishment stalls quickly when the drawings do not match the building. Door openings are out by 40 mm, floor levels vary room to room, and a ceiling void hides services no one expected. That is usually when a guide to measured building surveys stops being a nice-to-have and becomes a project requirement.

    Measured building surveys provide the dimensional record needed to design, plan, cost and manage work with confidence. For architects, contractors, estates teams and asset owners, the value is simple: fewer assumptions, fewer site returns, and a clearer basis for decisions. The right survey approach can save significant time later, but only if the scope, accuracy and outputs are properly aligned to the job.

    What a guide to measured building surveys should cover

    At its core, a measured building survey captures the physical geometry of a structure and turns it into usable information. That normally includes floor plans, elevations, sections and, where required, reflected ceiling plans or 3D models. Depending on the brief, it may also record structural elements, openings, floor level changes, roof forms, service features and external details.

    The point is not just to measure a building. It is to produce reliable, CAD-ready or model-ready data that supports the next stage of work. For a fit-out contractor, that may mean accurate internal plans. For a heritage consultant, it may mean detailed elevations and sections. For an asset manager, it may be a 3D record that can be reused across maintenance and lifecycle planning.

    A common mistake is to treat all measured building surveys as broadly the same. They are not. A simple office floor for lease planning is very different from a listed property with irregular geometry, restricted access and a requirement for high-detail elevations. Scope drives method, cost and programme.

    When a measured building survey is needed

    Most projects call for a measured survey when existing information is incomplete, outdated or unreliable. That is common in older buildings, multi-phase sites, altered interiors and operational estates where drawings have not kept pace with change.

    Typical use cases include refurbishment, extension design, space planning, facade assessment, heritage recording, dilapidations support, fire strategy updates and change-of-use projects. Building owners also commission surveys before disposal, acquisition or major maintenance planning, especially where downstream teams need dependable base information.

    There is also a practical risk point here. If multiple consultants work from inconsistent records, coordination problems appear early. Mechanical layouts clash with structure, ceiling heights are misread, and stair geometry causes compliance issues. A well-specified survey reduces that risk before it spreads through design and construction.

    Survey methods and where each one fits

    Traditional total station and tape-based methods still have a place, particularly for straightforward or smaller jobs. They can be effective where access is easy and the required output is limited. The trade-off is speed and completeness. Manual capture is more selective by nature, so omissions are more likely if the brief is not tightly controlled.

    Laser scanning has become central to modern measured building surveys because it captures dense spatial data quickly and with a high level of detail. Complex interiors, irregular facades, plant areas and multi-level environments benefit most. A point cloud gives the project team a far richer reference set than isolated measured points, which is particularly useful when designs evolve after the site visit.

    Mobile mapping and handheld LiDAR can also add value, especially where speed on site matters or access conditions make static setups less efficient. That said, suitability depends on required accuracy, geometry complexity and final deliverables. Faster capture is not automatically the best option if the end use demands stricter tolerances or highly controlled outputs.

    Photogrammetry can support facade work, roof areas and visually complex heritage environments, often alongside laser scanning rather than instead of it. In many projects, the strongest workflow is hybrid: the method is chosen around the building, the brief and the accuracy requirement, not the other way round.

    Accuracy, tolerance and level of detail

    Accuracy is one of the first questions buyers ask, and rightly so. But it needs context. There is no single “accurate enough” standard for every building survey. A layout for general space planning may tolerate less detail than fabrication support, conservation documentation or intrusive structural coordination.

    What matters is agreeing expected tolerances at the start. That should cover not only measurement accuracy, but also what is being represented in the final output. For example, are skirtings, beams, soffits, service penetrations or visible structural distortions to be shown? Are floor levels required throughout or only at key thresholds? Is roof geometry needed for design, or simply for outline reference?

    Level of detail directly affects both field time and processing time. More detail is not always better. If a client commissions a highly detailed survey for an early feasibility stage, they may be paying for information that will not be used. Equally, under-specifying a survey can create a false economy if teams later need revisits to capture missing elements.

    Outputs: what clients should expect

    The most common deliverables are 2D floor plans, elevations and sections in CAD format, often supported by PDF issue sheets. For many commercial and public-sector projects, that is still the most practical baseline.

    However, 3D outputs are increasingly requested, especially for coordination, visualisation and estate data reuse. Depending on the requirement, this may mean a registered point cloud, a Revit model, or a structured 3D representation built to an agreed level of information need. Not every project needs BIM-ready outputs, but where future phases depend on coordinated digital records, 3D can provide a much stronger long-term asset.

    Clients should also be clear about file compatibility and naming conventions. A technically strong survey loses value if the design team cannot integrate the data easily. Output requirements should therefore include formats, layering standards, control information and any project-specific modelling conventions.

    What affects cost and programme

    Survey pricing is shaped by more than building size. Complexity of geometry, number of levels, access restrictions, occupancy, required control, output detail and programme constraints all influence cost. So does site condition. A clean, vacant floorplate is much faster to capture than an occupied healthcare environment or a live industrial facility.

    Programme depends on both site capture and office processing. Clients sometimes underestimate the production stage, especially for detailed elevations, sections and 3D models. Capturing the data may take a day or two, but validation, registration, drafting and quality assurance can take considerably longer.

    There is also a commercial decision around timing. Early survey appointment often improves design efficiency because the team works from verified geometry from the outset. Delaying the survey to save budget can push uncertainty into later stages where design changes cost more.

    Choosing the right survey partner

    A measured building survey is only as useful as the team delivering it. Technical capability matters, but so does project understanding. The best survey partner will ask focused questions about end use, tolerances, constraints and downstream deliverables before proposing a method.

    For professional buyers, the key checks are straightforward. Can the supplier demonstrate experience with similar building types? Do they have the right capture technology for the site conditions? Can they produce outputs that fit your CAD or BIM workflow? Do they have the capacity to support urgent programmes or phased delivery if needed?

    It is also worth assessing whether the provider can support beyond data capture. On more complex projects, value comes from a joined-up service – fieldwork, processing, quality control, technical advice and, where needed, additional geospatial support. That is often where a specialist provider such as LiDAR Tech UK offers a commercial advantage, particularly for organisations that need both survey delivery and access to modern spatial capture technology.

    Common problems and how to avoid them

    Most issues with measured building surveys begin before anyone goes to site. The brief is vague, key areas are omitted, or stakeholders assume someone else has defined the required output. The result is usually rework.

    A better approach is to lock down purpose, survey extent, level of detail, access arrangements and file requirements at the start. If there are sensitive areas, restricted working hours, occupied zones or health and safety controls, these should be addressed in the survey planning stage rather than on the day.

    Clients should also be realistic about hidden conditions. A measured survey records what is visible and accessible at the time of capture unless the brief specifically includes intrusive investigation. Ceiling voids, concealed structure and covered service runs often need separate investigation if they are critical to design.

    Guide to measured building surveys for better project decisions

    The strongest reason to commission a measured building survey is not simply to obtain drawings. It is to reduce uncertainty. Accurate spatial data supports better design decisions, clearer coordination, tighter quantities and fewer surprises on site.

    That benefit is highest when the survey is specified properly. Match the method to the building, match the detail to the project stage, and make sure the outputs fit the way your team actually works. If you get those decisions right at the beginning, the survey becomes more than a record of the existing structure – it becomes a dependable base for everything that follows.

    If your project depends on accurate building geometry, the right time to define the survey is before assumptions make their way into design.

  • Survey Control Network Setup That Holds Accuracy

    Survey Control Network Setup That Holds Accuracy

    A control point that shifts by a few millimetres can become a very expensive problem once machine control, setting out, LiDAR registration or drone mapping all depend on it. That is why survey control network setup is not an administrative prelude to site work. It is the framework that determines whether every subsequent dataset agrees, scales correctly and stands up to scrutiny.

    For contractors, consultants and asset owners, the issue is rarely whether control is needed. The real question is how much control is enough for the site, the specification and the programme. A small topographical survey on open ground does not need the same network design as a rail corridor, a deformation monitoring scheme or a multi-phase construction project where different teams return to site over several months.

    What a survey control network setup needs to achieve

    At a practical level, a control network must do three things well. It must provide positions that are accurate enough for the intended deliverable, remain stable for the life of the project and be recoverable by more than one crew or instrument.

    That sounds straightforward, but performance depends on several linked decisions. Station spacing affects geometry. Monument type affects long-term reliability. Observation method affects achievable precision. Processing and adjustment affect whether errors are exposed or hidden. If one part is weak, the whole network becomes harder to trust.

    For most professional projects, the target is not simply to create a series of coordinates. The target is to establish a control environment that supports total stations, GNSS rovers, laser scanners, mobile mapping systems and drones without introducing avoidable discrepancies between platforms.

    Start with purpose, not equipment

    A good survey control network setup starts with the end use of the data. If the output is a boundary survey tied to a national grid, the control strategy will differ from one designed for internal construction coordination. If the project includes scan-to-BIM, façade monitoring or volumetric measurement, vertical control may matter just as much as horizontal control.

    This is where many avoidable errors begin. Teams sometimes choose a method because the kit is available rather than because the project requires it. RTK GNSS may be efficient on open sites with good sky visibility, but it is less dependable around tall structures, heavy tree cover or reflective surfaces. A traversed total station network may deliver stronger local geometry, but it takes more field time and benefits from careful closure design. Static GNSS can tie a site into a wider reference frame very effectively, but it may be excessive for short-duration works where local relative accuracy is the priority.

    The right approach is usually a combination. Primary control may be established with static GNSS or tied to known references, while secondary control is densified with total station observations to suit the site layout. That blended method often gives the best balance between absolute positioning and practical usability on site.

    Planning the network geometry

    Geometry matters more than many project teams realise. Well-placed stations create redundancy and make blunders easier to detect. Poorly placed stations produce a network that appears complete on paper but is fragile in practice.

    Stations should be intervisible where possible, with lines that avoid long narrow chains of dependent points. A single linear traverse can be acceptable in constrained corridors, but it carries more risk than a network with loops and cross ties. On larger sites, enclosing the work area with control and adding internal checks generally produces more reliable results than pushing control progressively outward from one starting point.

    Station location also needs practical judgement. A point that is theoretically ideal but likely to be disturbed by earthworks, resurfacing or plant movement is a bad investment. Permanent marks should sit outside likely construction impact zones while remaining convenient enough that crews will actually use them. There is no value in a perfect control mark if accessing it adds an hour to every visit.

    Primary and secondary control

    It helps to separate the network by function. Primary control should consist of the most stable, best-observed points on site. These points anchor the wider framework and should be protected accordingly. Secondary control can then support daily operations such as detail survey, scanning set-up or setting out.

    This distinction is especially useful on active construction sites. Secondary points are more exposed to damage and may need replacing. If the primary framework is sound, secondary control can be rebuilt without compromising the overall coordinate integrity of the project.

    Observation methods and trade-offs

    No single method is best in every environment. GNSS is fast and efficient, especially when linked to reliable correction services, but performance depends on satellite visibility, multipath conditions and communications. Total stations provide excellent relative precision and remain indispensable where line-of-sight observations are manageable. Laser scanning can support local registration control, but it should not replace a properly designed control network when traceable accuracy is required.

    A common commercial mistake is assuming that faster data capture offsets weaker control. It rarely does. If control is inconsistent, the time saved in the field is often lost in rework, alignment issues, failed quality checks or disputes over tolerances. On high-value projects, dependable control is usually one of the lowest-cost ways to reduce downstream risk.

    Datum, projection and height control

    Coordinate systems need explicit agreement at the start. National Grid, local grid, site grid and engineering grid all have their place, but mixing them carelessly creates confusion very quickly. The same applies to heights. Teams must know whether they are working with orthometric heights, ellipsoidal heights or a transformed site-specific height model.

    This is not just a processing detail. If the site uses multiple subcontractors, machine control providers and remote sensing workflows, a shared understanding of datum and projection prevents costly misalignment between datasets. A point cloud that is accurate in itself can still be commercially useless if it is delivered in the wrong frame.

    Quality control during survey control network setup

    Quality assurance should be built into the fieldwork, not added afterwards. Independent checks, repeat occupations and loop closures are what turn observations into trusted control. If a point is occupied once and accepted without redundancy, the network may be fast to establish but difficult to defend.

    Adjustment is equally important. Least squares adjustment is not simply a reporting formality. It helps identify residuals, weak geometry and observations that deserve scrutiny. Professional buyers increasingly expect this level of rigour because the control may support legal boundaries, design coordination or payment quantities.

    Tolerance should always be linked to project need. There is no universal figure that suits every survey. A highway scheme, a utilities as-built survey and a heritage recording project each have different accuracy demands. Over-specifying can waste time and budget. Under-specifying is usually more expensive later.

    Common reasons control networks fail

    Most failed networks do not fail because of one dramatic mistake. They fail because small assumptions go unchallenged. A mark is set in an unstable location. A transformation is applied without proper validation. A GNSS fix is accepted in marginal conditions. Secondary control is treated as permanent. Field notes are incomplete, so future crews cannot verify what was done.

    Another common issue is poor handover between teams. If surveyors, drone operators, scanning specialists and engineers are not working from the same control logic, discrepancies emerge that look like software problems but are actually control problems. Clear control reports, point schedules, sketches and method statements are part of the technical solution, not optional paperwork.

    Making control work across modern geospatial workflows

    Projects now depend on more than one instrument type. A network may need to support RTK rovers for topographical work, total stations for setting out, terrestrial LiDAR for detailed capture and drones for coverage at scale. The control strategy should anticipate that from the outset.

    For example, scanner targets and check points should be placed where they help registration without compromising the integrity of the wider framework. Drone ground control should be distributed for geometry rather than clustered where access happens to be easiest. Construction teams may need local working points, but those points should still resolve back to the primary network cleanly.

    This is where a joined-up provider adds value. LiDAR Tech UK supports organisations that need hardware, technical guidance and field-ready workflows to work together rather than operate as separate purchases. For many clients, that reduces the gap between specification and real-world deployment.

    When to redesign rather than extend

    There is a point where extending an ageing network becomes less efficient than redesigning it. If site conditions have changed, if several stations have been lost, or if the project scope now demands higher precision than originally planned, adding more patches can create confusion. A partial reset with clear control hierarchy is often the better commercial decision.

    The same applies when a project shifts from one phase to another. Early earthworks control may not be sufficient for structural steel, façade installation or deformation monitoring. Each phase should be assessed against current tolerance, access and programme requirements rather than assuming the original setup remains suitable.

    A well-designed control network does not attract much attention on a good day, and that is precisely the point. It lets every survey, scan and set-out task proceed with confidence. If you are planning new works, introducing GNSS or LiDAR workflows, or trying to bring consistency across multiple crews, getting the control right first will save far more than it costs.